
iamzip
Ambitious, but rubbish
I read, in another thread where a user was complaining that the drugstore scans looked better than his own, that the image you get from a scan is really a starting point, and you must tweak them in order to get them to look good.
So how do you tweak them? I haven't scanned much, but the B&W stuff seems okay to me, it's really the color stuff that I have trouble with. The colors never seem right to me. I'm using an Epson 4490 with the included Epson scan software, and I also have photoshop elements 2.0 or something like that. I've tried some of the quick fixes in epson scan, such as color restoration (even on brand new film) and that seems to help a little, but the colors really don't ever seem right to me.
So how do you tweak them? I haven't scanned much, but the B&W stuff seems okay to me, it's really the color stuff that I have trouble with. The colors never seem right to me. I'm using an Epson 4490 with the included Epson scan software, and I also have photoshop elements 2.0 or something like that. I've tried some of the quick fixes in epson scan, such as color restoration (even on brand new film) and that seems to help a little, but the colors really don't ever seem right to me.
jky
Well-known
When scanning, I adjust the curves to give me as much detail as possible in the highlights & shadows. The result is a fairly flat image with no pop & at first glance, it's nothing to write home about. But this is when Photoshop comes in. I try to retain detail as much as possible when scanning then tweak the image with the PS software (levels, curves, etc).
usagisakana
Established
I use an expson V700- When scanning I adjust histogram to give the image slightly less contrast than I want in the finished product (preserving a bit more detail to play with). Then I open in photoshop, play with curves till I like the look, then clone out dust spots. I then dodge and burn till I like the result.
EDIT: of course a very important part of all this is having a calibrated monitor.
EDIT: of course a very important part of all this is having a calibrated monitor.
dmr
Registered Abuser
I've found the best results are when using the scanner software to scan only, well, maybe some levels if they are obviously off, then adjusting and cleaning things up in Photoshop after the scan is done. Only a few times have I had trouble getting the colors to look right.
Chris101
summicronia
I have a scan tweak action for PS: Select all - new layer via copy - set layer to soft light - select all - copy merged - delete layer - paste - set layer to darken - set opacity as needed - select all - copy merged - paste - set layer to lighten - set opacity as needed - flatten.
I have been told that this is the same as using an s curve, but it gives me separate control over the darken and lighten sides of the curve, without one being affected by the other.
Note: I only do b&w.
I have been told that this is the same as using an s curve, but it gives me separate control over the darken and lighten sides of the curve, without one being affected by the other.
Note: I only do b&w.
madsolitaire
Established
One of the main reasons why i shoot film is NOT to photo-shop. I prefer the look of the original colours (or b&w). I only use photo-shop to salvage 'bad' pictures. In which case, it would usually involve adjusting the exposure and the highlights/shadows and adding a little bit of sharpening. And depending on the mood that i wish to create, i might increase the contrast or use the vignetting effect.
iamzip
Ambitious, but rubbish
Okay, I don't know how to do any of that stuff. I mean, I've heard of curves and histograms, and have a vague understanding, but I don't really know how to manipulate them. Where's a good place to start using? I am fairly computer savvy, so that shouldn't be a problem. Are there any online tutorials, or perhaps even one included with Elements? That way you don't have to try to explain it to me on here.
dmr
Registered Abuser
One of the main reasons why i shoot film is NOT to photo-shop. I prefer the look of the original colours (or b&w). I only use photo-shop to salvage 'bad' pictures. In which case, it would usually involve adjusting the exposure and the highlights/shadows and adding a little bit of sharpening. And depending on the mood that i wish to create, i might increase the contrast or use the vignetting effect.
IMAO, that is one proper use of Photoshop.
Likewise, it can be said that anything right off the scanner will be "bad" to one extent or another. I very seldom get an image from the scan that's close to being ready for presentation.
Like it or not, once you scan, you've exited that utopian world of film and entered the Dark Side! From then on, what you do will be {sigh, deep breath} digital! Yes, I said it, the forbidden word!
")
If you don't like the d-word, you can safely use the euphemism "hybrid" instead.
One thing you have to do in that digital world is "repair" what the scanner did, as in not rendering the look of your photo properly. I've found that in most cases, simple level adjustments and such things as cropping and spotting will give you an image that does show the characteristics of your style, the look of the film, etc.
Over on the Dark Side, there's a lot of misuse of Photoshop I admit. We don't have to look hard for examples, but one proper use of Photoshop (or Gimp or whatever) is to finish the job that the scanner started.
januaryman
"Flim? You want flim?"
You really need to get a good book on Elements and or Photoshop and just play around a bit until you understand what these terms are. The "Missing Manual" book on Elements was good. If you go to Lynda.com there are some intro classes you can look at for free http://movielibrary.lynda.com/html/modListing.asp?pid=77 and Elements Techniques has some podcasts doing some similar stuff - also there's Scott Kelby's stuff - he does books and some so-so online classes http://www.kelbytraining.com/online/all-classes.html --Okay, I don't know how to do any of that stuff. I mean, I've heard of curves and histograms, and have a vague understanding, but I don't really know how to manipulate them. Where's a good place to start using? I am fairly computer savvy, so that shouldn't be a problem. Are there any online tutorials, or perhaps even one included with Elements? That way you don't have to try to explain it to me on here.
Good luck. And READ your product manuals!
mh2000
Well-known
So how have you insured that your scanner scans the negative precisely getting only the original colors and b&w tonality. Similarly, how do you insure that you paper and chemical choices in the darkroom result in precisely giving the film's "original" b&w?
>>One of the main reasons why i shoot film is NOT to photo-shop. I prefer the look of the original colours (or b&w). I only use photo-shop to salvage 'bad' pictures.
>>One of the main reasons why i shoot film is NOT to photo-shop. I prefer the look of the original colours (or b&w). I only use photo-shop to salvage 'bad' pictures.
Keith
The best camera is one that still works!
One thing I've noticed about images I scan and I guess it's not rocket science ... the better the exposure the less I have to do. For important shots I bracket and the extra usage of film involved in bracketing is more than made up for by having an image that I don't have to manipulate to make it actually look like I got the correct exposure! I realise that you can't bracket with a lot of spontaneous photography, street comes to mind, but for the rest it's a no brainer!
When in doubt ... bracket!
When in doubt ... bracket!
craygc
Well-known
For my, working a scanned image can take anything from around 20~40 minutes for 35mm up to 1.5 ~ 3hrs for a 6x7. My first comment is that I only work on a flat image and never use layers.
Initial work is global - black and white points, some global contrast adjustments through curves usually in conjunction with luminosity masks. After the global adjustments I start on the local areas. Pick an area and make curves adjustments for the particular area (with no consideration for the rest of the image), mark this as a history state, go back to the previous state and paint the areas in to effect. I keep repeating this across different local areas until satisfied. I sometimes work further with more luminosity masks and gaussian blur before sharpening but the reasons for when and why I do this are not part of typical adjustments so I'll leave it here. This is all 99% on B&W; if and when I ever use colour, I convert to L*a*b, switch of the "a" and "b" channels then just work it as a B&W before converting back to an RGB space.
This image is nothing special but to get the overall tonality to where it is took about 3 hours - admittedly its a 185MB single channel file from a 6x7 scan, which slows things down. Off the scan it took a lot of time to bring the sky and distant hills into detail relative to the foreground, even before the foregrounds own processing. This was not something a more "correct exposure" could have fixed.

From my perspective, direct scanned film, without post-processing is a long way from a presentable image.
Initial work is global - black and white points, some global contrast adjustments through curves usually in conjunction with luminosity masks. After the global adjustments I start on the local areas. Pick an area and make curves adjustments for the particular area (with no consideration for the rest of the image), mark this as a history state, go back to the previous state and paint the areas in to effect. I keep repeating this across different local areas until satisfied. I sometimes work further with more luminosity masks and gaussian blur before sharpening but the reasons for when and why I do this are not part of typical adjustments so I'll leave it here. This is all 99% on B&W; if and when I ever use colour, I convert to L*a*b, switch of the "a" and "b" channels then just work it as a B&W before converting back to an RGB space.
This image is nothing special but to get the overall tonality to where it is took about 3 hours - admittedly its a 185MB single channel file from a 6x7 scan, which slows things down. Off the scan it took a lot of time to bring the sky and distant hills into detail relative to the foreground, even before the foregrounds own processing. This was not something a more "correct exposure" could have fixed.
From my perspective, direct scanned film, without post-processing is a long way from a presentable image.
Frank1969
Member
I also use an Epson 4490 but I use the filmholder from www.betterscanning.com Lots better than the original Epson holder.
After cleaning the scan from dust in photoshop, I run the file through Adobe Lightroom. I am very happy with the results.
Frank
www.flickr.com/photos/asialover
After cleaning the scan from dust in photoshop, I run the file through Adobe Lightroom. I am very happy with the results.
Frank
www.flickr.com/photos/asialover
Robin P
Well-known
I have an Epson 4490 too and find getting right colour the most frustrating thing about post processing. Yes, a well exposed neg makes it easier but of course the most "interesting" photos are taken in unusual lighting conditions and the auto exposure of the Epson can't always cope.
Try the free version of Photofiltre from http://photofiltre.free.fr/download_en.htm
Make a copy of your original scan and play with the autolevels and colour balance, don't worry about overdoing it - Photofiltre has a great Edit option where you can fade the result of the last action you applied.
Go away from the computer for a cup of tea and make sure the colour still looks believable when you come back, then save.
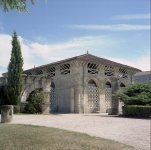
Here's a quick one I did earlier (yes I know the saturation looks low to some eyes but this was Portra 160NC).
Finally, try different films, on balance I find the Epson often gives better colour with Fuji.
Cheers, Robin
Try the free version of Photofiltre from http://photofiltre.free.fr/download_en.htm
Make a copy of your original scan and play with the autolevels and colour balance, don't worry about overdoing it - Photofiltre has a great Edit option where you can fade the result of the last action you applied.
Go away from the computer for a cup of tea and make sure the colour still looks believable when you come back, then save.
Here's a quick one I did earlier (yes I know the saturation looks low to some eyes but this was Portra 160NC).
Finally, try different films, on balance I find the Epson often gives better colour with Fuji.
Cheers, Robin
Attachments
Graham Line
Well-known
Okay, I don't know how to do any of that stuff. I mean, I've heard of curves and histograms, and have a vague understanding, but I don't really know how to manipulate them. Where's a good place to start using? I am fairly computer savvy, so that shouldn't be a problem. Are there any online tutorials, or perhaps even one included with Elements? That way you don't have to try to explain it to me on here.
I started with Elements and bought Philip Andrews' tutorial books. I'd literally sit there with the book on my lap and figure out how to solve the problems.
willie_901
Mentor
I scan with the minimum possible in-scanner adjustments. I use a flat curve, minimal sharpening, etc. This is an attempt to create a tiff file that is pseudo-raw. I generate 2400 ppi 16 bit per channel files to use as a contact sheet. I rescan the keepers at 4800 ppi.
I do all the color balancing and other post-processing adjustments on my pseudo-RAW image in Lightroom.
The reason I use this method is that Lightroom is much easier to use and is much faster than SF. And, I like the results.
My scanner software (Silverfast) can produce what SF calls an HDR tiff. In SF's reality distortion field HDR =RAW, i.e. the unaltered output from the scanner sensor. However this file needs to be inverted for negatives, and I have never been able to get results I like with SF's HDR scans in Lightroom. Perhaps with Adobe's new DNG profile application I can create a profile that works with SF HDR.
For very poorly exposed negatives/transparencies I use SF to adjust the image in the scanner.
willie
ampguy
Mentor
yup
yup
To get great scans, use the scanner defaults, use unsharp mask, don't plan to fix everything in photoshop later (you won't need to).
yup
To get great scans, use the scanner defaults, use unsharp mask, don't plan to fix everything in photoshop later (you won't need to).
One of the main reasons why i shoot film is NOT to photo-shop. I prefer the look of the original colours (or b&w). I only use photo-shop to salvage 'bad' pictures. In which case, it would usually involve adjusting the exposure and the highlights/shadows and adding a little bit of sharpening. And depending on the mood that i wish to create, i might increase the contrast or use the vignetting effect.
Morca007
Matt
For my, working a scanned image can take anything from around 20~40 minutes for 35mm up to 1.5 ~ 3hrs for a 6x7. My first comment is that I only work on a flat image and never use layers.
No layers?! Why, that's insanity!
Bob Michaels
nobody special
I've been scanning and outputting to print b&w films for about six years using Vuescan and a Minolta MultiPro. I have a mix of 6x7 and 35mm that is about 50/50.
First, I only insure that the histogram is not clipped in the scan, nothing else. I do the rest in Photoshop.
I do almost everything in layers in case I need to go back and readjust. Memory is cheap and so is disk space. My time is worth more.
My workflow is simple but does the trick for me:
1) I scan the neg at actual pixels to insure there are no dust spots. If I find any, I clean them up with the healing brush.
2) I manually set the levels using the histogram. Really simple. I've tried Auto Levels and finds it almost works as good.
3) I adjust the contrast using curves (always in a separate layer). I am convinced this is where the difference between a good and really interesting b&w print happens. I almost always use only two points on the curve but their placement is very important. I most often end up with a S shaped curve that increases the contrast in the midtones (the "snap") and flattens out the shadows (no blocked up shadows). I do tend to overexpose and overdevelop, sort of an N -1 approach, to give myself enough detail in the neg to work with.
4) in those rare instances where I still have highlight or shadow areas to deal with, I use a separate layer for each. I tend to overcorrect and then vary the opacity of that particular layer get the desired degree of correction.
I've done this enough so it typically takes me about 3-4 minutes for each neg. No problem as I'm doing this at the same time the previous file is printing.
I have to give thanks to Richard Sintchak, a/k/a Rich 815, who taught me most of this back in 2002.
craygc
Well-known
No layers?! Why, that's insanity!
Really! I always work in 16-bit mode, and until recently I have worked in PS-7, so no layers were available, and I could always do everything somehow. Even in CS3, my only purpose was to have access to more RAM for handling medium format scans. Most work I perform on an image is done by freehand and by eye - that is painting in from some state with a pen & tablet. I have always worked that way and have never had a problem nor found a reason to go back and rework or change an image later. I usually "know" where I want to take an final image an have no trouble to technically get there.
For me, the insanity is having some huge library of PSD files just to support the layers. With all images being being 4000 dpi scans and mostly B&W thats ~40MB for 35mm and ~185MB for 6x7 as flat TIFFs. Already, this is hard on storage, especially when Im using RAID 1 configurations for working files plus additional incrementally backups.
Juz dun need layers....
Share:
-
This site uses cookies to help personalise content, tailor your experience and to keep you logged in if you register.
By continuing to use this site, you are consenting to our use of cookies.