Took a break from the computer to do some lens work. An RFF member sent me an Early J-8, all German Glass, that could not be focused anywhere near infinity- let alone to be used with the RF. AND- sent a second J-8 with a broken front element that I could part out for projects.
The bad news: the barrels of both were epoxied into the focus mount. The amount of force would break the guide screws that hold the helical together. The nice lens was close-focusing, meaning the shim was too thick. My fix- unscrew the rear group, required less than 2/3 turn. That worked better than expected, the focus is now perfect across the full range. That means the focal length was too short on the lens, which I have seen happen before.
The dead-glass lens, take apart the helical, pop all the glass and let soak in solvent. The rear group unscrews from the back. the name ring was loose on this one, so the front elements could come out. Now you have a solid part to grab to get the barrel out.
The "donor" J-8.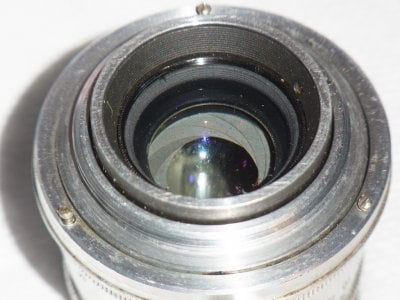
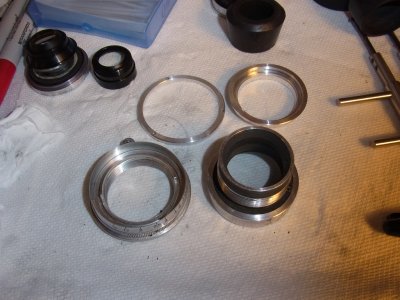
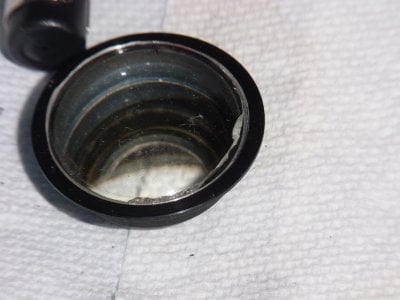


wlewisiii
Just another hotel clerk
A good reminder of how I don't have a clue what to look for when buying a Jupiter lens these days. Not like when you could get several cheaply and just keep the one that worked  Perhaps I'll go look eprey anyway or maybe Fedka's web store.
I picked up a CZJ 5cm F2 Sonnar T from an RFF member a few months ago, a perfect candidate for conversion.
First- this lens needed a clean-lube-adjust. Glass in very good condition, some coating marks- but much better than most I've seen.
BLUF: It had a lot of 80+ year old grease in it. I went through a lot of Q-Tips and paper towels getting it out. I needed this, been writing a ton of code lately.
Not shown- loosening the small set screw that holds the barrel into the Contax mount. Collapse the lens, revealing the screw. It will be partially covered by the mount, but can be loosened. Undo it, no need to take out. The barrel unscrews easily. If it dor not unscrew- either a thin shim jammed in the threads, or someone epoxied it after it left the factory.
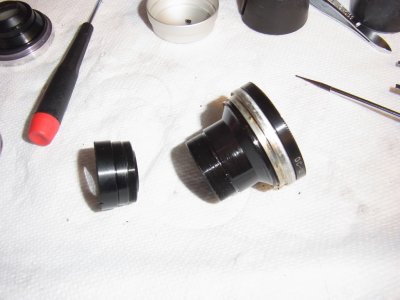
The rear fixture was in tight on this one. I had to use a little alcohol around the junction, then use a spanner on the Inner threads. Trust me- do the inner ring, less chance of the spanner slipping and damaging the glass. "Learned the Hard Way"
Mark the orientation of the retaining ring Undo the one screw that holds the retaining ring for the aperture ring in place. Be sure to Scribe the position, this ring must be put back on exactly the same position for the focus to agree with the RF.
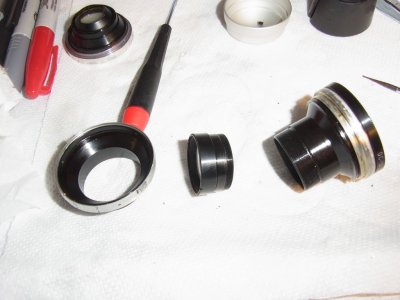
Retaining ring off, undo the screw that Links the aperture ring to the mechanism. The aperture ring is not threaded, it drops off. If no one has cleaned this lens before, it will have a lot of 80+ year old grease all over the place.
It also reveals two set screws on the name ring.
First- this lens needed a clean-lube-adjust. Glass in very good condition, some coating marks- but much better than most I've seen.
BLUF: It had a lot of 80+ year old grease in it. I went through a lot of Q-Tips and paper towels getting it out. I needed this, been writing a ton of code lately.

Not shown- loosening the small set screw that holds the barrel into the Contax mount. Collapse the lens, revealing the screw. It will be partially covered by the mount, but can be loosened. Undo it, no need to take out. The barrel unscrews easily. If it dor not unscrew- either a thin shim jammed in the threads, or someone epoxied it after it left the factory.

The rear fixture was in tight on this one. I had to use a little alcohol around the junction, then use a spanner on the Inner threads. Trust me- do the inner ring, less chance of the spanner slipping and damaging the glass. "Learned the Hard Way"
Mark the orientation of the retaining ring Undo the one screw that holds the retaining ring for the aperture ring in place. Be sure to Scribe the position, this ring must be put back on exactly the same position for the focus to agree with the RF.

Retaining ring off, undo the screw that Links the aperture ring to the mechanism. The aperture ring is not threaded, it drops off. If no one has cleaned this lens before, it will have a lot of 80+ year old grease all over the place.
It also reveals two set screws on the name ring.
Unscrew the set screws. Mark the position, there are Taps underneath. Do not be surprised if these screws break, they are fragile. If they do: try the ones from the J-8 you are using as a donor.
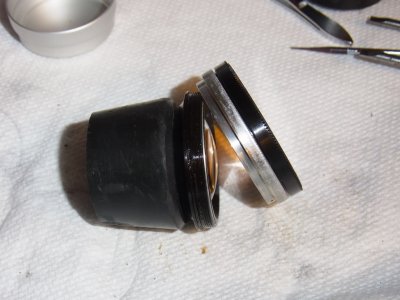
The front element and middle triplet are both stamped in metal rings. All 3 sections have SN stamped.
The front element will fall out: it is not screwed in. Be careful, hold over a piece of lens cleaning paper. You might need a suction cup. Chances are some grease has gotten into the fixture.
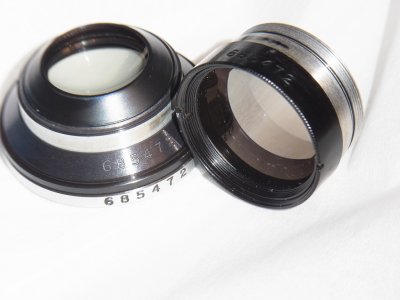
At this point, all the glass is out. I flood clean the aperture blades, I do not take them out. I put the barrel into a pyrex container and use alcohol to flood clean. It works.
For this lens: the Tabbed J-8 focus mount follows the Zeiss standard to the point that this lens was in perfect focus from close-up to infinity setting a shim for the Aperture to line-up correctly with the J-8 index. That does not happen all the time, maybe 1 of 5 times, but this lens was charmed. That means the Aperture ring did not have to be re-indexed.
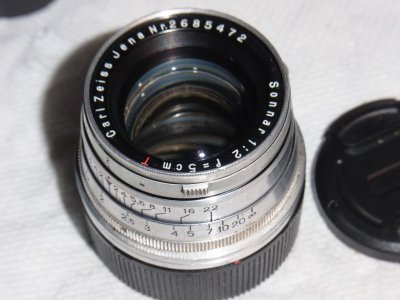
The solvent removed the paint from the distance scale and DOF scale of the J-8. I use a Black Sharpie, cover the entire side of the lens to fill in the numbers, Then- take a Q-Tip with alcohol to remove the excess. The ink in the engraved portions stays put. This takes a few minutes, and it works.

The front element and middle triplet are both stamped in metal rings. All 3 sections have SN stamped.
The front element will fall out: it is not screwed in. Be careful, hold over a piece of lens cleaning paper. You might need a suction cup. Chances are some grease has gotten into the fixture.

At this point, all the glass is out. I flood clean the aperture blades, I do not take them out. I put the barrel into a pyrex container and use alcohol to flood clean. It works.
For this lens: the Tabbed J-8 focus mount follows the Zeiss standard to the point that this lens was in perfect focus from close-up to infinity setting a shim for the Aperture to line-up correctly with the J-8 index. That does not happen all the time, maybe 1 of 5 times, but this lens was charmed. That means the Aperture ring did not have to be re-indexed.

The solvent removed the paint from the distance scale and DOF scale of the J-8. I use a Black Sharpie, cover the entire side of the lens to fill in the numbers, Then- take a Q-Tip with alcohol to remove the excess. The ink in the engraved portions stays put. This takes a few minutes, and it works.
Last edited:
Cloudy, snow showers, cold.
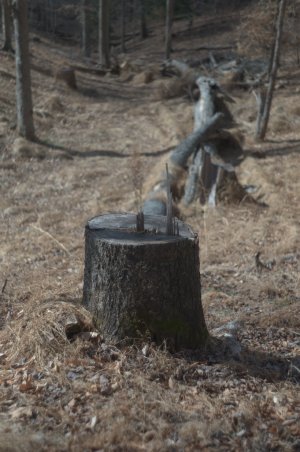
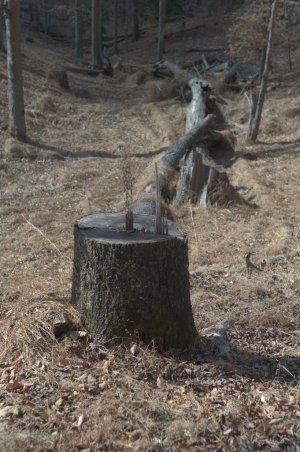
But enough light for a focus test on my calibrated fence post. I can mentally convert focus error on this post to change in shim thickness for a 50mm lens.
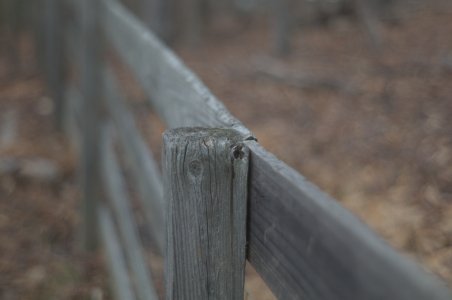
NAILED IT! No need to re-index the aperture ring!

Good to Infinity. Need to stop down for Beyond.
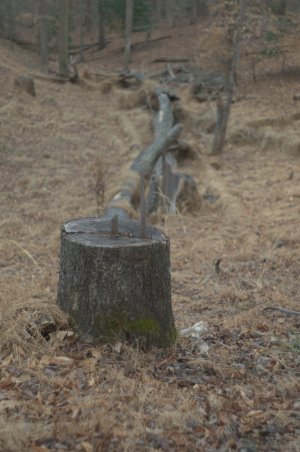
At F2 above,
F4, below. Typical Sonnar focus shift. This one is optimized for F2. I optimize almost all of my Sonnars for wide-open.
It's what I do.
But enough light for a focus test on my calibrated fence post. I can mentally convert focus error on this post to change in shim thickness for a 50mm lens.

NAILED IT! No need to re-index the aperture ring!

Good to Infinity. Need to stop down for Beyond.

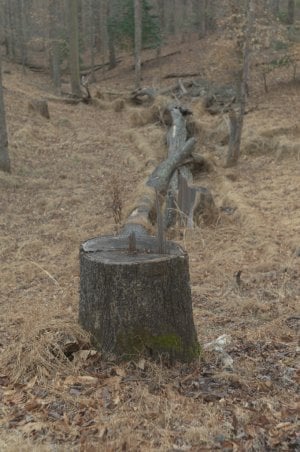
At F2 above,
F4, below. Typical Sonnar focus shift. This one is optimized for F2. I optimize almost all of my Sonnars for wide-open.
It's what I do.

milescl
Well-known
Awesome work, as always, Brian.
I'm glad that #2.68 T coated lens was able to be revitalized. It really deserved it.
I'm glad that #2.68 T coated lens was able to be revitalized. It really deserved it.
I'm looking forward to Spring with this pair on the M9. Both render beautifully.Awesome work, as always, Brian.
I'm glad that #2.68 T coated lens was able to be revitalized. It really deserved it.
And one at F4- I put one small dab of Vacuum pump grease under the aperture ring, for a nice, well-damped movement. On the opposite end of the aperture linkage, and near the top of the lens. In 20 years- have not had Vacuum pump grease run or separate.

I Have a forum friend in Australia that bought a J-3 from Fedka. It was a mess. He sent it to me, I set it straight, went back to Australia. So- his total cost for that lens was the J-3 and the cost for THREE international shipments to Australia. I was not going to add cost for my time to that misery- Learned a lot for tales from the greasy side.. It was a Valdai. Say no More.A good reminder of how I don't have a clue what to look for when buying a Jupiter lens these days. Not like when you could get several cheaply and just keep the one that workedPerhaps I'll go look eprey anyway or maybe Fedka's web store.
wlewisiii
Just another hotel clerk
Good to know since his prices are on the higher side. I had good luck with him in my Kiev/Contax days though so I was thinking of him.
I should stick to looking for a sane price for a Summitar
I should stick to looking for a sane price for a Summitar
wlewisiii
Just another hotel clerk
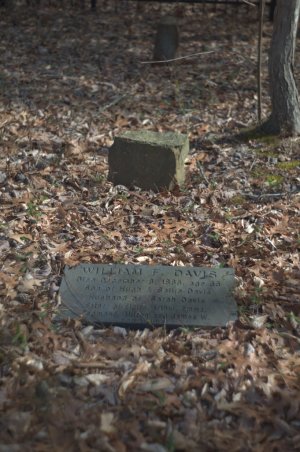
I know you think of these as _just_ test images but #3 is a really nice image. I like that a lot.
Edit: your portraits of your daughter are as wonderful as ever too.
I really like #3 as well.
As soon as I saw it on the M9 Screen, named it "Go into the Light". The graves still have the weathered headstones, and all have settled several inches over the many decades.
Yes, test images- but I enjoy a nice walk in the neighborhood, which includes the 19th century Family graveyard. Today- warmed up, went into the gated area. Light was beautiful. Walk around shots like this are much better at showing the character of a lens, and this one is a real keeper.
"I needed a 5cm F2 Sonnar T" for an upcoming review...
Last edited:
Took a second walk - very late day sunlight.
Wide-Open.
At F4,
The contrast on this Sonnar at F2 is much higher than the uncoated version . Not the huge change when stopping down to F4.

Focus is on the leaf at the right, then composed.
I need to line up a few 5cm f2 Sonnar formula lenses for a comparison. Come on Spring!
Wide-Open.

At F4,
The contrast on this Sonnar at F2 is much higher than the uncoated version . Not the huge change when stopping down to F4.

Focus is on the leaf at the right, then composed.
I need to line up a few 5cm f2 Sonnar formula lenses for a comparison. Come on Spring!
dexdog
Mentor
Brian, looks good! I have a 227 series f2 with pristine glass that you converted for me years ago. I should take it out and use it.
Share:
-
This site uses cookies to help personalise content, tailor your experience and to keep you logged in if you register.
By continuing to use this site, you are consenting to our use of cookies.


