
boojum
Mentor
The rear plastic cover on the "chimping" screen of my M9 has come adrift. It reveals an inner screen and a surrounding small raised plastic frame. I can press the loose plastic outer protective cover back in place where it belongs on the back of the camera and it will hold but not stay there when in the camera bag. Or in use out in the big, bad world.
So has anyone else had this problem and if so what was the solution?
So has anyone else had this problem and if so what was the solution?
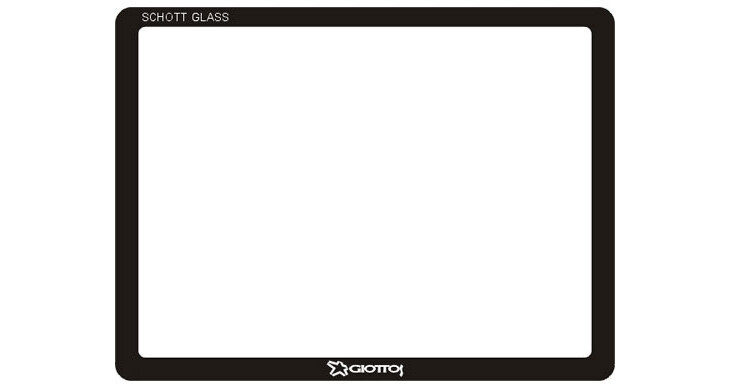
Can you post some pictures? I've kept Giotto's cover glass on the M9 and M8 since I bought them.
 www.bhphotovideo.com
It uses double-sided adhesive. I think the Leica uses the same. Jon Goodman sold a double-sided adhesive, if available- I would try it.
Giottos Aegis Professional M-C Schott Glass LCD Screen Protector for Select Canon / Sony A / Olympus / Nikon / Leica / Fujifilm Cameras
Buy Giottos Aegis Professional M-C Schott Glass LCD Screen Protector for Select Canon / Sony A / Olympus / Nikon / Leica / Fujifilm Cameras featuring German "Schott" Optical Glass, Professional Optical Screen Protector, Safeguards Against Scratches, Impact, 12 Layers of Anti-Reflective Coating...
It uses double-sided adhesive. I think the Leica uses the same. Jon Goodman sold a double-sided adhesive, if available- I would try it.
boojum
Mentor
OK, here is what my phone saw:


I would try cleaning the glass screen and using fresh double-side tape, like what Jon Goodman sells. Alternative- send in for repair.
boojum
Mentor
I'll try the double-sided tape. Who is Jon Goodman and where is he?I would try cleaning the glass screen and using fresh double-side tape, like what Jon Goodman sells. Alternative- send in for repair.
Jon Goodman sold on Ebay as "interslice".
I do not see any seal kits for sale, but you might send a message.
interslice on eBay
Follow interslice on eBay. Buying, Selling, Collecting on eBay has never been more exciting!
www.ebay.com
I do not see any seal kits for sale, but you might send a message.
boojum
Mentor
Yes, indeed, message sent. Thanks.Jon Goodman sold on Ebay as "interslice".
interslice on eBay
Follow interslice on eBay. Buying, Selling, Collecting on eBay has never been more exciting!www.ebay.com
I do not see any seal kits for sale, but you might send a message.
boojum
Mentor
Where did you get your Giotto's screen protector? I cannot find one for an M9.Can you post some pictures? I've kept Giotto's cover glass on the M9 and M8 since I bought them.
It uses double-sided adhesive. I think the Leica uses the same. Jon Goodman sold a double-sided adhesive, if available- I would try it.
I bought it on Amazon- when I bought the M9, and M8 before that.Where did you get your Giotto's screen protector? I cannot find one for an M9.
Probably out of production- think you need to look for new-old-stock.
barrydesign
Newbie
Potential double-sided tapes, 3M 9482PC or 3M 9485PC, the former is .002" thick, the latter is .005" thick. Both are available from McMaster-Carr as part numbers, 7628A68 and 7628A72, respectively. These tapes are Very High Bond (VHB) designated tapes, and to my knowledge, there is no solvent (for easily cleaning away/removal). For using the .002" thick, the contact surface must be very smooth. The .002" will also be rather challenging to work with.
To apply (to the glass), I'd suggest four pieces, two along the horizontal and two on the vertical. You may want to use a thin cotton swab, just slightly wet with isopropyl alcohol, to gently clean only the black areas where previous adhesive existed. The McMaster p/n tapes are .5" wide. Don't try to pre-cut the tapes to match the width of black on the glass. Cut the tape to approximate length (either for horizontal or vertical), leaving the release liner on the tape, and apply onto the glass covering just the black perimeter region (allowing the excess width to protrude beyond the glass). Press/rub the tape (with its release liner in place) for ~10 seconds. Then, using a sharp razor blade, cut the regions of tape protruding beyond the glass (using the glass as a guide). You'll now have the cover glass, with four pieces of VHB tape (with release liner), on four sides of the glass covering the black regions (former adhesive areas), matching the outer glass dimensions. The corners of the glass will not have tape, and these will be openings (between LCD and glass) following installation. Over time, It may be possible for some dust migration into the gap between LCD glass (blowing this out may not be possible). I don't have an immediate suggestion for sealing these corners.
There will be a challenge in accurately placing the glass onto the LCD. The VHB tape allows very little opportunity for repositioning after placement. Remove one of the release liners and begin to seat the glass, tilting it so that just a line of the exposed adhesive contacts the LCD. With tweezers, as the glass will be too close to the LCD to use your fingers, remove the remaining release liners and push the glass in place onto the LCD. In less than a few minutes, it may become impossible to remove the glass from the LCD. Make sure everything is clean before installing the glass as you don't want to be permanently looking through a dirty glass onto a dirty LCD.
I'm thinking the .005" thick VHB is the more appropriate for this application, unless the contact areas of the LCD and glass are very smooth.
With the limited repositioning aspect of this VHB tape, practice applying numerous times with this tape on representative samples to gain understanding. For example, if you have an old credit card (or similar) pretend it's the cover glass and apply the tape as would be done with the actual cover class. Before applying the tape to the credit card, outline the credit card on a piece of card board, then thicken the outline; that is your practice LCD. Practice the procedure multiple times until you're fully comfortable and confident. Being completely confident is necessary, as stated earlier, to my knowledge (~15 years ago when I called 3M) there is no solvent. If the cover glass is installed slightly askew of the LCD, or the LCD/glsss is dirty, it's likely not possible to remove the glass, even with a gentle solvent application about the perimeter (as there is no solvent). That initial seating of the glass on the LCD must be exceptionally well aligned and all surfaces clean. I can not overstate with this VHB being structural grade, reworking the glass application to the LCD, is not possible.
boojum
Mentor
Hey, thanks! Wow, this is real step-by-step. Two questions: #1 why keep the corners bare? #2 this tape is not rated to 250F, are you sure it will work. ;o) I will try and get the Schott glass. That failing I will use Simichrome to polish out the scratches on the original plastic back. You have been a great help and I appreciate it, for sure. You put in the tricks that make it easier.
OK, I found this at Amazon. I am asking them does it cover the original or replace it. In case I cannot find the Schott glass.
RFF dos not want to display the link so here is the brand: Kinokoo screen protectors
OK, I found this at Amazon. I am asking them does it cover the original or replace it. In case I cannot find the Schott glass.
RFF dos not want to display the link so here is the brand: Kinokoo screen protectors
Last edited:
Boojum... I do not think YOU are rated to 250F... My Field Rugged Embedded Processors are rated to 85C constant running. Good enough for me.
To quote Egon Spengler, "That would be Bad".
To quote Egon Spengler, "That would be Bad".
Last edited:
boojum
Mentor
A guy can never be to cautious. ;o)Boojum... I do not think YOU are rated to 250F... My Field Rugged Embedded Processors are rated to 85C constant running. Good enough for me.
To quote Egon Spengler, "That would be Bad".
Cautious?A guy can never be to cautious. ;o)
When I write a piece of code, I always tell people "Well, the worst that can happen is the computer bursts into flames running it." "But that has only happened twice."
Ko.Fe.
Lenses 35/21 Gears 46/20
Good reminder, every camera with screen I got gets protector instantly. Should get it for my K-3.
barrydesign
Newbie
Not filling the corners is due to cutting the VHB tape square; image below, red represents installed tape.
You could miter, but that would be quite challenging, and you don't want to overlap the tape. In the corners, I'm thinking it would be preferable not to run the internal corners of the VHB tape to nearly touching (where the red lines nearly contact). Allow a bit of space between the tapes (at the corners) to make the application more forgiving to one-time manual effort.

.
You could miter, but that would be quite challenging, and you don't want to overlap the tape. In the corners, I'm thinking it would be preferable not to run the internal corners of the VHB tape to nearly touching (where the red lines nearly contact). Allow a bit of space between the tapes (at the corners) to make the application more forgiving to one-time manual effort.
.
boojum
Mentor
Gotcha. Thank you.Not filling the corners is due to cutting the VHB tape square; image below, red represents installed tape.
You could miter, but that would be quite challenging, and you don't want to overlap the tape. In the corners, I'm thinking it would be preferable not to run the internal corners of the VHB tape to nearly touching (where the red lines nearly contact). Allow a bit of space between the tapes (at the corners) to make the application more forgiving to one-time manual effort.
View attachment 4820969
.
Rob-F
Likes Leicas
Is there a reason not to just get a new Giotto glass?
boojum
Mentor
Try and find it for an M9Is there a reason not to just get a new Giotto glass?
The protective glass need not be intended for your specific camera model... check the dimensions and pick a product that is close to the right size. I once picked a Nikon-intended glass for (I think it was) a Pentax. Works fine.
Share:
-
This site uses cookies to help personalise content, tailor your experience and to keep you logged in if you register.
By continuing to use this site, you are consenting to our use of cookies.