
Mos6502
Well-known
I picked up an old Spiratone print dryer, which came with a couple of ferrotyping sheets. I've never ferrotyped fiber prints before, but since I have the sheets and test prints to experiment with, I want to try it out. Reading comments on the internet (a reliable source as usual) I've come across various reference to how the prints need to be treated, ranging from "nothing" - just squeegee them onto a well cleaned ferrotyping sheet and let them air dry, to adding a few drops of photoflo to the wash water, to numerous calls for using a product called Pakosol, or using a hardening fix.
It doesn't appear Pakosol is available anymore, but the MSDS info says the active ingredient was Hexylene Glycol. I wonder if any chemists could advise me whether the more commonly available, and non-toxic Propylene Glycol could be used as a substitute? Alternatively I see a lot of people suggesting the use of glycerin as s substitute. If nobody has any ideas or experiences with this, I may just experiment with dilutions of both and see what happens.
It doesn't appear Pakosol is available anymore, but the MSDS info says the active ingredient was Hexylene Glycol. I wonder if any chemists could advise me whether the more commonly available, and non-toxic Propylene Glycol could be used as a substitute? Alternatively I see a lot of people suggesting the use of glycerin as s substitute. If nobody has any ideas or experiences with this, I may just experiment with dilutions of both and see what happens.
raydm6
Yay! Cameras! 🙈🙉🙊┌( ಠ_ಠ)┘ [◉"]
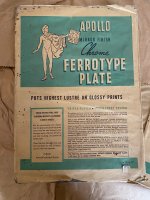
Sorry I can’t answer your question but I found two 12x17” Apollo Mirror Finish Chrome Ferrotype Plates in my Dad’s old photography supplies (probably dates from the 1940’s). I don’t know anything about these or the process. Is it related to what you are doing? I have no idea how to use these things.
Attachments

Mos6502
Well-known
Yes. That's what I'm talking about. It's just a highly polished sheet of chromed steel (or stainless steel). Wet fiber prints are placed face down on them, squeegeed, and then left to dry. Once fully dry the result (when all goes right) is a glass-like glossiness to the surface of the print.
ptpdprinter
Mentor
Yes. That's what I'm talking about. It's just a highly polished sheet of chromed steel (or stainless steel). Wet fiber prints are placed face down on them, squeegeed, and then left to dry. Once fully dry the result (when all goes right) is a glass-like glossiness to the surface of the print.
Theoretically.
Chriscrawfordphoto
Real Men Shoot Film.
Ferrotyping gives a very high-gloss finish, very smooth with no texture. The problem is that the plates have to be flawless; no scratches or dust on them because scratches will produce lines on the print and dust will embed in the print.
When I was in high school, the darkroom used by the school's photography classes had a ferrotyping dryer that consisted of a metal drum that was heated from the inside and a continuous canvas blanket that held prints to the drum. You laid the prints face up on the canvas, which pulled them into the dryer and into contact with the rotating drum. After going around the drum, they came back out dry. The drum had numerous microscratches that shows in prints if you looked carefully. Worse, a student scratched "F--K YOU" on the drum. If your print went in at the right moment, it could end up having "F--K YOU" show up on the glossy print surface!
When I was in high school, the darkroom used by the school's photography classes had a ferrotyping dryer that consisted of a metal drum that was heated from the inside and a continuous canvas blanket that held prints to the drum. You laid the prints face up on the canvas, which pulled them into the dryer and into contact with the rotating drum. After going around the drum, they came back out dry. The drum had numerous microscratches that shows in prints if you looked carefully. Worse, a student scratched "F--K YOU" on the drum. If your print went in at the right moment, it could end up having "F--K YOU" show up on the glossy print surface!
Dogman
Mentor
Yeah, those big drum dryers were great until they were not. Like when some dope loads it up with RC papers and leaves it for others to clean up the mess.
john_s
Well-known
Decades ago I had the use of a flat bed dryer with a ferrotyping sheet. It was owned by a very experienced photographer. I used it successfully with the aid of Kodak Glazing Solution which contained some formaldehyde (identified by the smell, it was used as a household disinfectant back in those days).
Later, I bought my own flat bed dryer which came with a brand new ferrotyping plate but, even doing what I had done before, I was never able to replicate the perfect glaze that I had got previously. Kodak used to have instructions about which grade of aloxite polishing abrasive to use and it was exceedingly fine. They specified that no other grade would do. I didn't persevere. I decided that unglazed FB paper was good enough.
Later, I bought my own flat bed dryer which came with a brand new ferrotyping plate but, even doing what I had done before, I was never able to replicate the perfect glaze that I had got previously. Kodak used to have instructions about which grade of aloxite polishing abrasive to use and it was exceedingly fine. They specified that no other grade would do. I didn't persevere. I decided that unglazed FB paper was good enough.
Mos6502
Well-known
So far I've played with prints washed in plain water, and the results have been mediocre. I learned right away that more heat was better than less heat, too little heat left prints sticking to the plates (strangely, only on the edges/corners, sort of the opposite of what I would have expected).. A little more heat lead to prints that released on their own, but blobular forms over the print where they had released from the plate one bit at a time (this is not really visible when the print it viewed dead on, but I'm sure anybody who's tried ferrotyping knows the effect I'm referring to). A high heat reduced, but did not totally eliminate this effect. So next attempt will be adding photoflo to the print wash, I can imagine how this might help reduce the above mentioned problem. After that, I will try a dilution of propylene glycol.
ranger9
Well-known
Back in the day I got very good ferrotyping results using the following procedure:
Note for noobs: Ferrotyping only works on F-surface, fiber-base paper (e.g. Polycontrast F). DO NOT try to ferrotype other fiber-base papers and DOUBLE DO NOT try to ferrotype resin-coated (RC) papers!
- Soak the print in a very strong solution (like 1:50) of Photo-flo.
- Make sure the ferrotype plate is absolutely clean.
- When ready, pour a LOT of Photo-flo solution onto the plate, take the print out of the Photo-flo, then let the print down onto the surface of the wet plate using a rolling motion. Be careful not to trap any air bubbles (which is why you use the rolling motion rather than plopping it onto the plate all at once.)
- GENTLY squeegee off excess water without flexing or bending the plate. Don't press too hard or you'll disturb the surface. Gentle pressure with a windshield wiper blade worked best for me.
- Let the plate dry undisturbed. When the print is dry, it will pop off the plate.
Note for noobs: Ferrotyping only works on F-surface, fiber-base paper (e.g. Polycontrast F). DO NOT try to ferrotype other fiber-base papers and DOUBLE DO NOT try to ferrotype resin-coated (RC) papers!
x-ray
Mentor
I can’t even guess the tens of thousands of glossy fiber prints I’ve made over the years. I owned a couple of the large floor model Pako and Arcay dries and a couple of tabletop units. High gloss prints are certainly beautiful if done right.
If you can’t find Pakosol I have approximated it by using a little photoflo which I believe is currently polyethylene glycol or propylene glycol ( without looking I cant remember), a little ethanol and some glycerin. I would mix about 25ml of glycerin with about 15ml of photoflo and around 25ml of ethanol like ever clear. 91% isopropyl would probably work. The alcohol probably could be eliminated if you don’t have it. I’d add this to about 2000ml of deionized or distilled. Discard after use to keep dirt from contaminating it. Dust and dirt will kill the gloss.
In the old days photoflo was ethylene glycol which is toxic if ingested but works just fine.
The purpose of a glossing agent is to break the surface tension of the water and allow it to create an even layer of water between the chrome surface and the gelatin of the print. If you have ANY AIR bubbles it won’t gloss at that spot.
I soaked the prints for about 5 minutes in Pakosol then you’ll need to place them face down in the tin. If you use a flat tin you’ll need a really good squeegee that you can squeeze as much water from between the print and tin or a really good rubber roller. I think a heavy duty squeegee is the best. The print needs to be in perfect contact with the glossing surface.
The glycerine and alcohol help release the print when it dries and helps with even drying. If done right the print will pop off the tin when it’s completely dry and have that classic deep gloss.
Tins improve with use and should never be cleaned with anything abrasive. Bonami cake soap was the best and wasn’t abrasive but it’s no longer made. Bonami powder is abrasive and will ruin your tins. Flitz polish is probably the best but have not used it on tins but have used it on very delicate surfaces like nickel.
Best of luck and hope you get some killer glosses.
PS: if the gloss isn’t perfect you can re-soak the prints
Freakscene
Obscure member
It took me a while but I found the formula. Kodak print flattening solution was 99% ethylene glycol and 1% formaldehyde 40% solution (formalin). Use was 1 part of that concentrate with 10 parts water, and the instructions allowed further dilution to 1 + 20 for use in humid environments (this was what I used in Brisbane). Kodak indicated that the prints were more durable and flexible, and that it gave the print a more supple feel. It was recommended for ferrotyping.
Note that formalin is carcinogenic and its fumes are difficult to manage without adequate extraction and air handling.
PF600 contains ethylene glycol, but PF200, the product home developers normally use, uses propylene glycol. They also have radically different dilutions for use. PF600 is mostly used in motion picture processes. PF600 is now available only in 4 x 1 gallon bottles https://www.kodak.com/content/produ...21a-Disclisting-replacement_Photo-Flo-600.pdf
The octylphenoxypolyethoxyethanol actually does most of the 'wetting' (reducing surface tension).
Marty
Note that formalin is carcinogenic and its fumes are difficult to manage without adequate extraction and air handling.
In the old days photoflo was ethylene glycol which is toxic if ingested but works just fine.
PF600 contains ethylene glycol, but PF200, the product home developers normally use, uses propylene glycol. They also have radically different dilutions for use. PF600 is mostly used in motion picture processes. PF600 is now available only in 4 x 1 gallon bottles https://www.kodak.com/content/produ...21a-Disclisting-replacement_Photo-Flo-600.pdf
The octylphenoxypolyethoxyethanol actually does most of the 'wetting' (reducing surface tension).
Marty
Mos6502
Well-known
Thanks for the info. So there's no point in trying propylene glycol if I'm using photoflo.
Decided to try photoflo tonight. Started with a relatively weak dilution, which did appear to result in flatter prints. However the "cockling" ringing from uneven drying still occurred. So I tried a stronger dilution, and the result was the same. Finally tried a very strong dilution of about 1:4 and this had an odd effect when the prints were soaked in it, appearing to saturate the paper fibers and giving dark spots on the back of the print (where the dark spots appear to be dark portions of the image showing through the paper, maybe?). So I did not try anything stronger. These last prints did not release completely from the ferrotyping plate, but this may be an issue with the plate itself as it is one I hadn't used previously (although it was cleaned with soapy water and a soft sponge like the others).
I also used both sides of the dryer simultaneously tonight, and found this was a perfectly efficient way to absolutely ruin any surface the dryer is placed on! Luckily I had it sitting on top of an old cabinet, the lacquered top of which had already been ruined.
Mos6502
Well-known
Having experimented a bit with different temps, different photoflo dilutions, and the various ferrotyping plates I have, I am now consistently drying prints with a perfect edge-to-edge gloss. It takes surprisingly little photoflo to get good flat prints with no ringing or "cockling", about twice as strong a dilution as what would normally be used for film, and I'm sure using distilled water for the mix is another big factor. It does seem to be the truth that the more one uses a plate, the better the results. It looks like the first few rounds of prints basically "suck" the dirt and other impurities off the chrome, and this is a far more effective cleansing than soap and water can provide. If one is looking to resuscitate an old ferrotyping plate, its best to save your test prints and strips for the first few sacrificial rounds of drying.
Mos6502
Well-known

Doing very good. The only problem I've been having really is that sometime the prints pop themselves off the plate before completely dry, and even with the canvas cover on, they still get a slight wave along the edge.

Mos6502
Well-known
So I received some NOS ferrotyping plates, which I found on ebay for a price lower than new ones. The results with these have been perfect. Absolutely perfect.
The process that I have found to work for me is:
*wash prints
*air dry prints
*soak prints in photoflo solution of about 1:100 (twice as strong as used for film) for at least ten minutes
*apply to plates sopping wet, and roll on with a roller
*drain excess photoflo off plate, you do not want excess water on the plate when you put it on the dryer
*dryer set to just above medium temp (obviously this is going to vary from model to model)
*use tightest notch for the canvas cover
The prints will pop off the chromed plate with an audible popping noise when dry. I run cold water over the plate before applying the next set of prints, starting with a hot plate seemed to have a detrimental effect, producing an uneven gloss. But I haven't experimented with this enough to say for sure yet, prints just seemed to come out better when applied to a cold plate.
 Ferrotyping Prints 3 by Berang Berang, on Flickr
The process that I have found to work for me is:
*wash prints
*air dry prints
*soak prints in photoflo solution of about 1:100 (twice as strong as used for film) for at least ten minutes
*apply to plates sopping wet, and roll on with a roller
*drain excess photoflo off plate, you do not want excess water on the plate when you put it on the dryer
*dryer set to just above medium temp (obviously this is going to vary from model to model)
*use tightest notch for the canvas cover
The prints will pop off the chromed plate with an audible popping noise when dry. I run cold water over the plate before applying the next set of prints, starting with a hot plate seemed to have a detrimental effect, producing an uneven gloss. But I haven't experimented with this enough to say for sure yet, prints just seemed to come out better when applied to a cold plate.
Ferrotyping Prints 3 by Berang Berang, on FlickrErik van Straten
Mentor
After ferrotyping the prints you can flatten them in a Seal glue press. Cover the print with a piece of ordinary paper and press at 70 F for 90 seconds. This is also great for normally dried gelatin/silver prints. "Normally dried" is dried in a flatbed print dryer (a two or one-sided one with a curved plate on each side, a canvas belt over each, and a heating element in the middle) at a digitally controlled temperature of 35 C for half an hour.
Personally I don't like ferrotyped prints, their 'natural' gloss is by far preferable, in my opinion.
Erik.
Personally I don't like ferrotyped prints, their 'natural' gloss is by far preferable, in my opinion.
Erik.
Mos6502
Well-known
The Fomatone paper I tried had a nice gloss out of the box. On the other hand the "glossy" Fomabrom paper I got, I wouldn't describe as glossy at all in its natural state, it took a nice gloss during ferrotyping and looked much better. Both looked better than any glossy RC paper I've used.
PRJ
Another Day in Paradise
I ferrotype with plexiglas. You can search Photrio for how I do it. I am pretty sure I put instructions in a thread there. No muss no fuss. No heat even. I can't remember how I came up with the idea, but it had to do with the static charge of plexi. The prints "sticks" to it. Even when dry. It doesn't actually stick though. I use a guitar pick to catch an edge and then it comes right off.
Mos6502
Well-known
So I tried throwing prints from the wash straight into the photoflo dilution. No-go. Ended up with cockling. I'm guessing the water in the prints prevents the necessary quantity of photoflo from getting into the print, the other prints I let dry overnight, popped them into the same photoflo solution this morning, and they took a perfect gloss.
I might try plexiglass, but since I have the chromed plates already, that's what got me interested in trying it.
I might try plexiglass, but since I have the chromed plates already, that's what got me interested in trying it.
Mos6502
Well-known
Worth noting that soaking fiber prints in photoflo also results in a flatter print when air dried, although perhaps not so perfectly flat to be worth it if you have a blotter book or press.
Share:
-
This site uses cookies to help personalise content, tailor your experience and to keep you logged in if you register.
By continuing to use this site, you are consenting to our use of cookies.