
SurlaCraque
Member
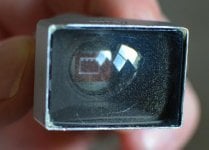
Hey guys I just picked up a 35mm SBLOO finder for my IIIf. Sadly it's very dusty inside. The dust looks like its on the curved glass behind the flat piece of glass on the front face of the finder. Looks to me like this flat glass is tacked into the housing with some kind of glue at the corners. See pic.
I'm kinda bummed. It's usable but pretty dusty if any light is coming in from the front. Is there any way to clean this?
TIA
I'm kinda bummed. It's usable but pretty dusty if any light is coming in from the front. Is there any way to clean this?
TIA
Attachments
Peter Jennings
Well-known
To open it up, you just need to remove that big piece of glass in front. It’s held in place by a tar-like adhesive. Soften the adhesive with some alcohol. I believe there is a thread that explains how to do this in greater detail. You should probably do a search. I did it once to my dirty SBLOO and now it’s fantastic. The best viewfinder.
Coldkennels
Barnack-toting Brit.
Although this thread is ancient, now that I've strip-cleaned my SBLOO, I want to leave a comment just in case someone else has this problem in the future.
The front element is glued in place. Choose your preferred method for making the glue more pliable; I already had some movement in mine, so I just opted for pushing it out (more on that in a mo). As Peter said, soaking the edges in rubbing alcohol/isopropyl should help. Some people suggest applying heat - that sounds like a good way to crack the glass, so I'm not fond of that.
Either way, you've got to get it out once the glue's dealt with. There's some "ribbing" inside the viewfinder's outer shell to stop the glass just dropping out, so you need to push it from behind. In the middle of the viewfinder's foot, there's a tiny grub screw - you'll need a very small 1mm x 0.2mm precision screwdriver to take it out.
Once that's out and the front is loosened, push GENTLY on the rear element using something soft and padded and that should push the front out (so do it over something soft so you don't smash it!). The rear element is glued into the back of an internal spacer; it's unlikely you'll have to remove the rear element to clean inside of it (and it's best you don't, as you could damage and/or rotate the framelines this way), so this should give you easy access to everything you need to clean.
Reassembly is quite straightforward as there's only those two pieces. I opted to try to "liven up" the now-dry original glue/cement with some rubbing alcohol instead of replacing it with more glue as I'd read elsewhere that could work. Whether it has or not I don't know - the "ribbing" might be doing all the work to hold that front element in place, but it doesn't look like it's about to drop out any time soon (fingers crossed). Your mileage may vary.
shawn
Mentor
Thanks for the info. My SBLOO is a little hazy inside so it wouldn't hurt to open it up and clean it.
Share: