
NicoM
Well-known
Hi Tom,
I was wondering if you have any experience with opening up a Voigtlander Bessa Trigger Winder. When I bought my R2a, it came with a Trigger Winder, which unfortunately does not function.
I was informed that it'd cost $90 to be examined and could be more expensive if parts are needed to repair it. I don't have the extra cash right now to send it in, but I was wondering if you had any idea how to open up the winder. It seems as if something is stuck, but I can't get this darn thing open it figure out what it is!
The lever pops out and folds back in properly, but I can't advance the trigger.
Thanks in advance!
Nico M
Tom A
RFF Sponsor
Nico, I have only taken one of these apart - long time ago, at the Cosina factory. Lots of screws to remove - and the locking mechanism. Not impossible though Most likely the clutch has seized or something has gotten stuck in it. It is fairly simple construction though. I take one of mine of the a camera and look at it and let you know how to disassemble it.
NicoM
Well-known
Thanks Tom!
Tom A
RFF Sponsor
N so be sure to keep them sorted., you have to peel off the covering on the top-plate (glued on( and then you can access the screws. Small "philips" head screws (000 size screw driver). The screws are different lengths and have to go back in the same hole. Just do a sketch of the top - indicate which screw goes were and tape it down on the paper. Once you removed the screws - the inside top-plate can be lifted off and you can access the works. There are several "gears" that surround the clutch and be careful as the top plate holds these in place. Carefully use the lever and see if the drive moves when it is off the camera and try to "sput" where the "jamming" occurs. The design is a mixture of my Rapidwinder (clutch/belt/sprocket and the Leicavit for the MP/M6 (lever primarily).
If you have access to a digital camera - take pictures as you proceed - makes re-assembly much easier.
Good luck and keep me posted.
If you have access to a digital camera - take pictures as you proceed - makes re-assembly much easier.
Good luck and keep me posted.
NicoM
Well-known
Thanks Tom! I was able to open up the winder. When I lifted the smaller portion of the cover slightly, it seemed to have loosened something that was stuck. To my surprise, the trigger started moving again. I didn't bother opening the small portion further, but it seems that it's functioning as it should now.
Again, I appreciate you time and help. Thank you!
Again, I appreciate you time and help. Thank you!
Jfrago
Newbie
My rapid winder doesn't advance the fil.
My rapid winder doesn't advance the fil.
Hello Tom,
The problem with my winder is that the cocking mechanism moves but the film doesn't doesn't advance. I have read the other posts here regarding taking about the rapid winder so I was wondering what I would encounter after I opened it and what do you think I will encounter?
Thank you.
John
aaronpang16
Newbie
Firstly apologies for reviving a dead thread. This is my first post on the forum.
Recently repaired my trigger winder and taken some pictures of the teardown.
Hope someone finds the pictures useful because there's not much information available online on taking one apart.
Peel back the stuck on covering and keep aside.
The tape backing is very tacky and can be reused.
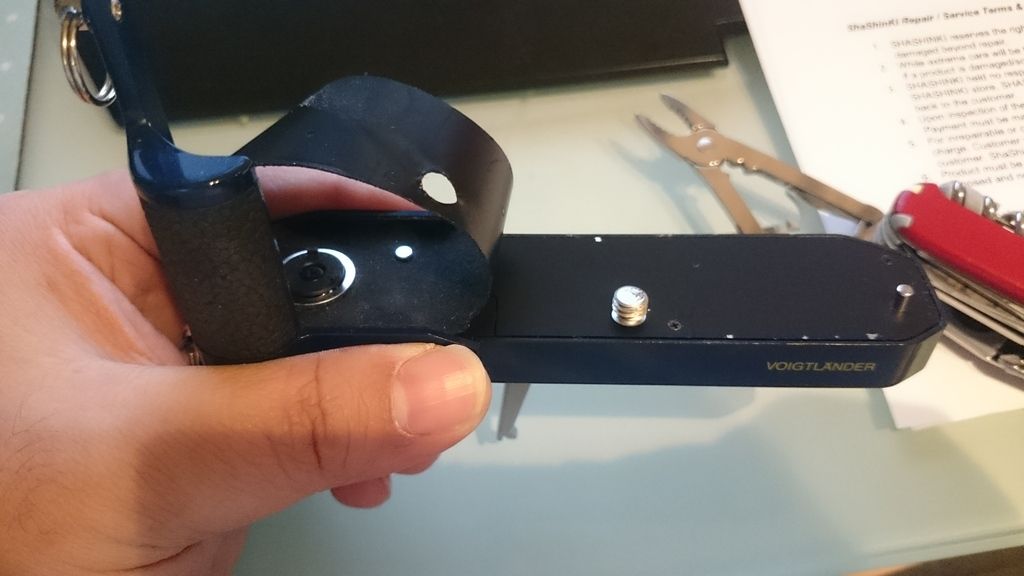
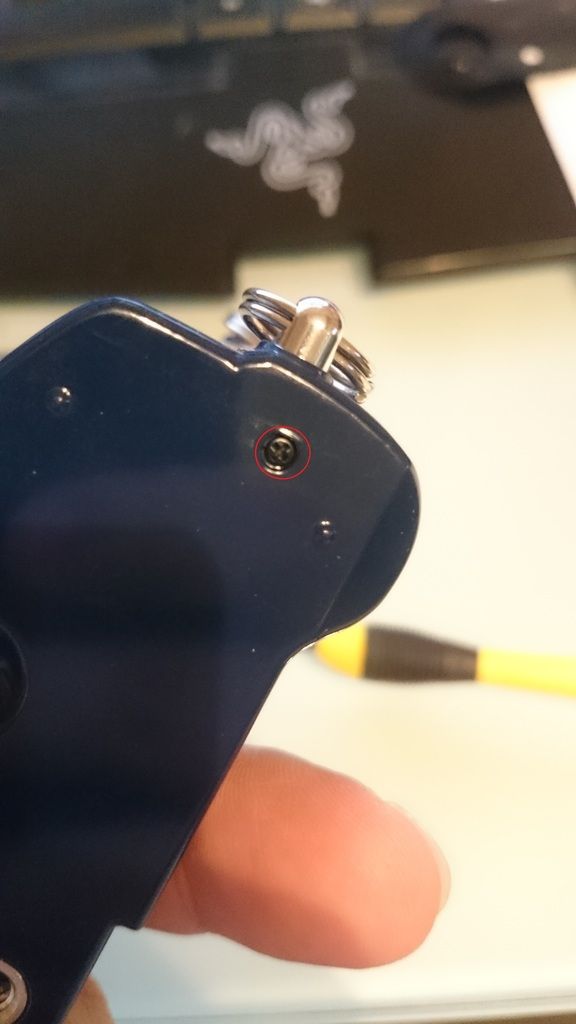
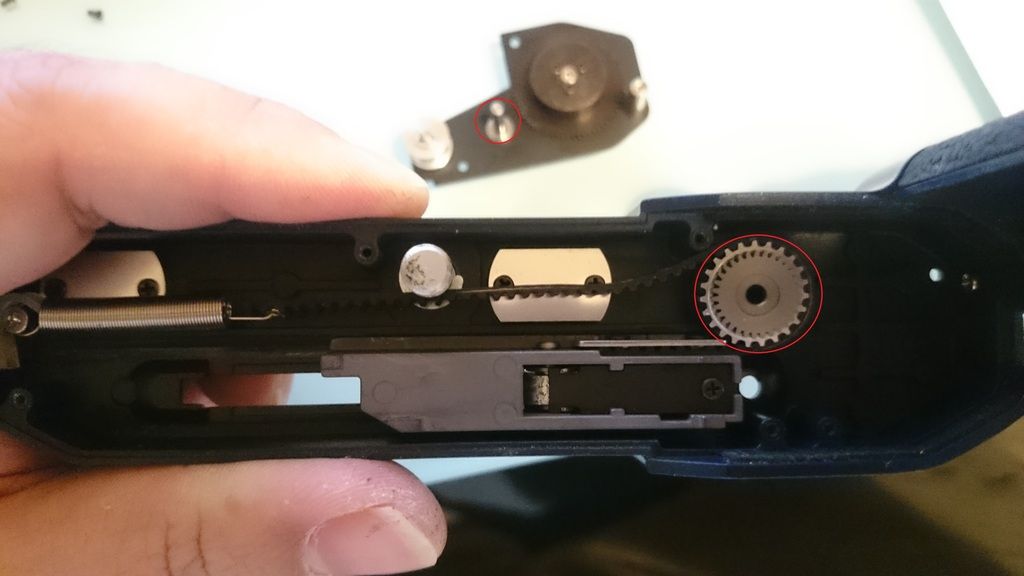
Remove screws marked in red.
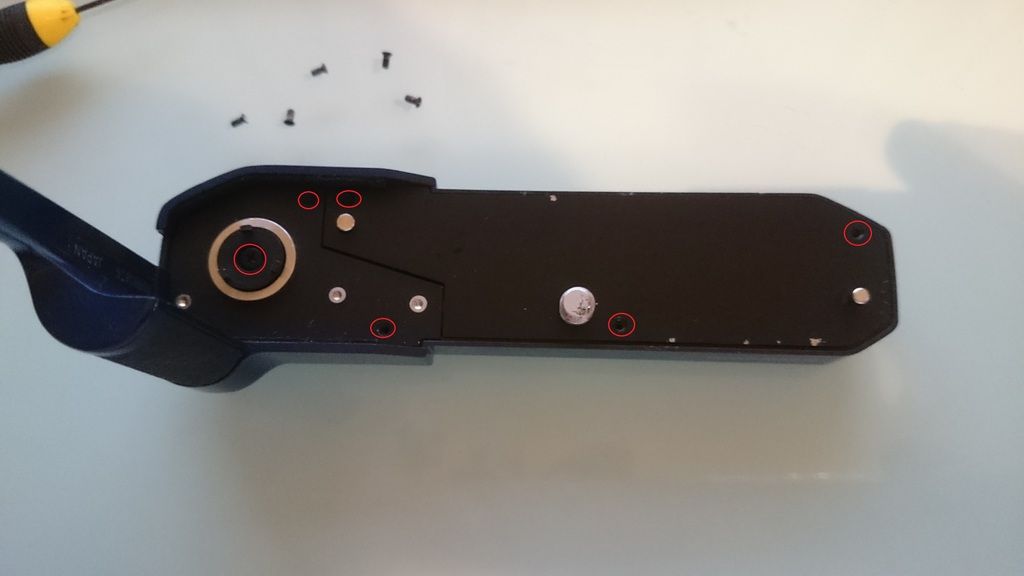
Remove single screw at the bottom.
Removing the top plate revealing winder innards.
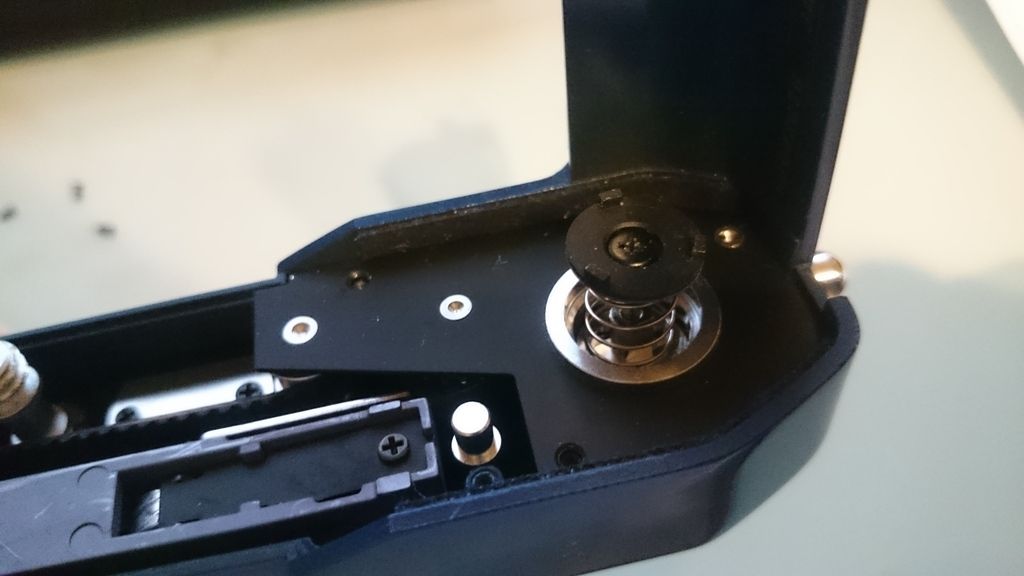
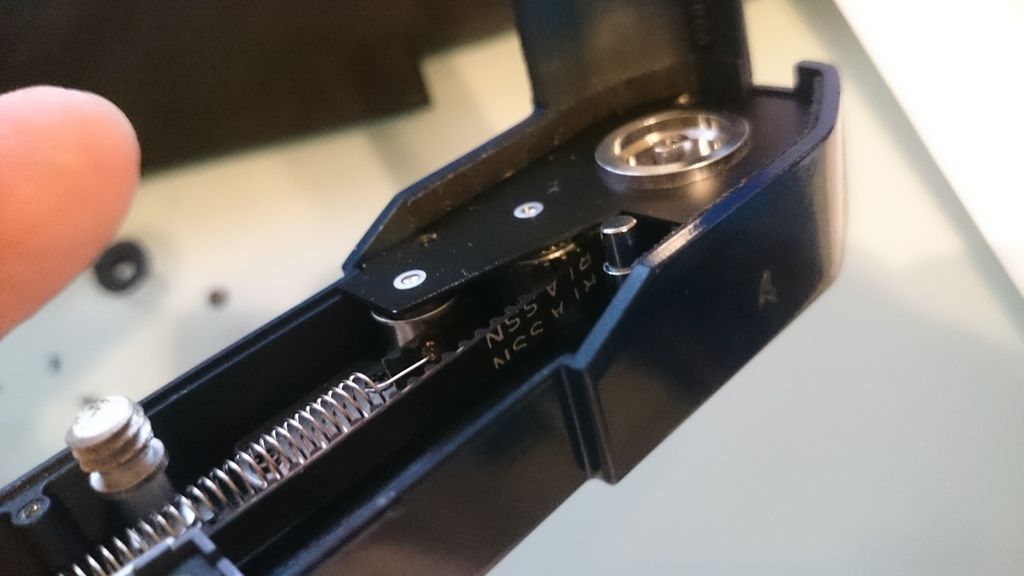
Highlighting gear and bearing assembly.
In background is corresponding pin that holds the gear and bearing assembly in place.
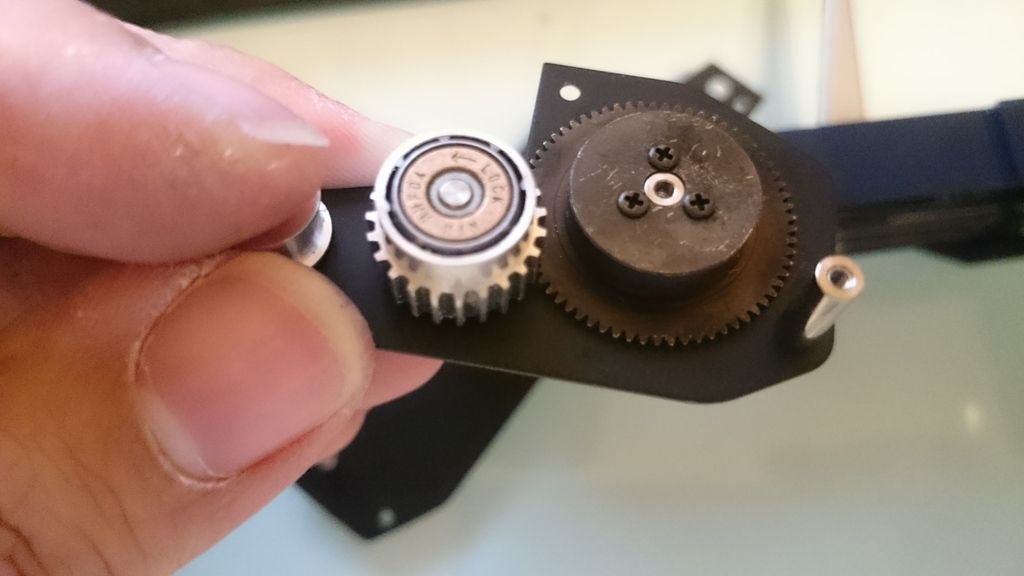
Closer look of gear and bearing assembly.
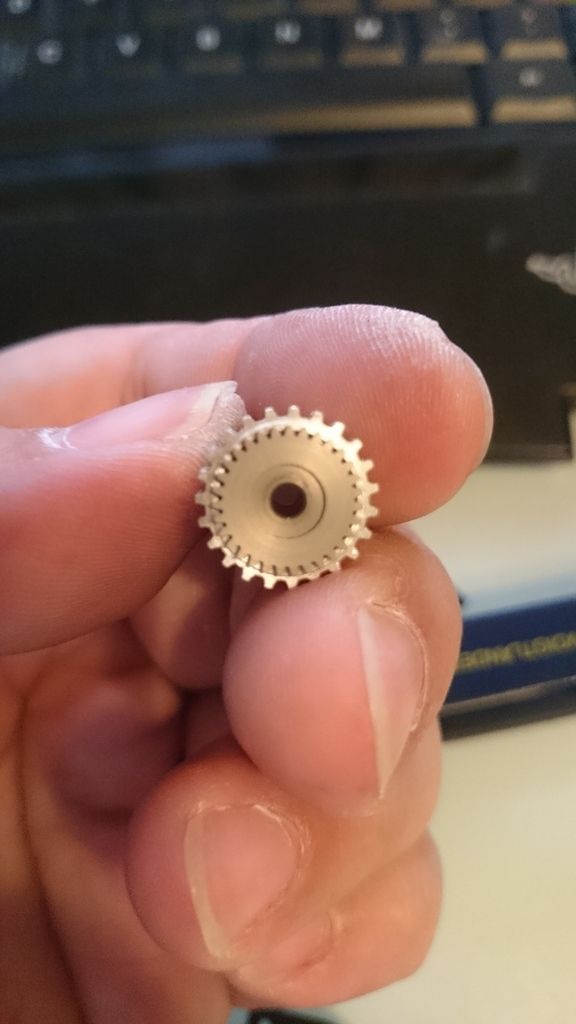
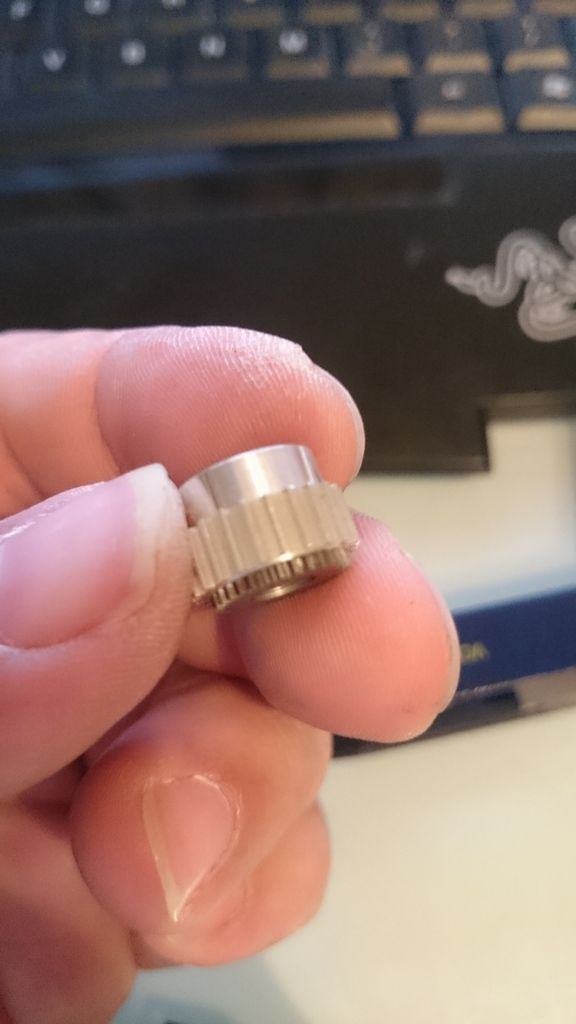
The assembly comes apart by sliding the sleeves off the bearing.
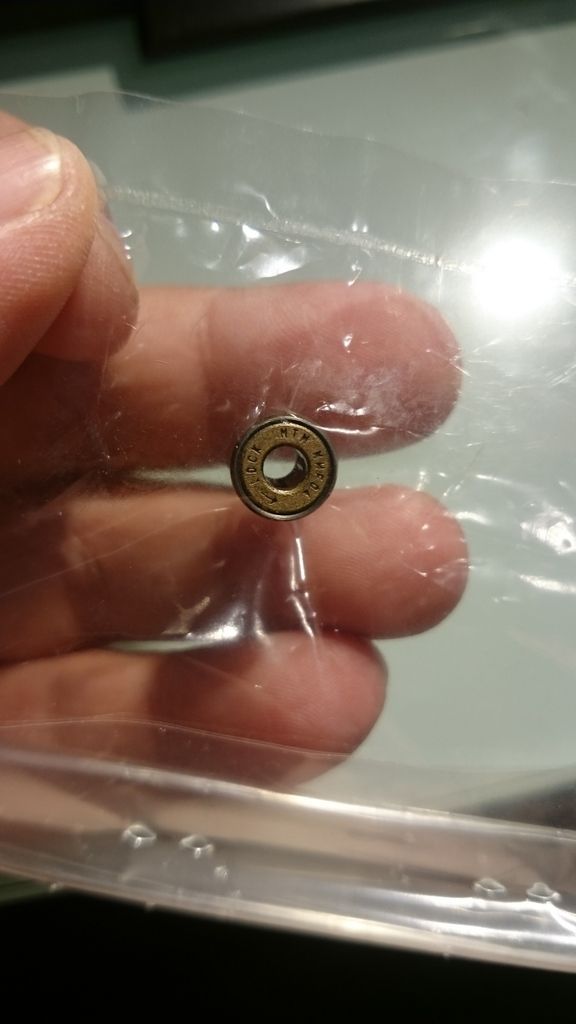
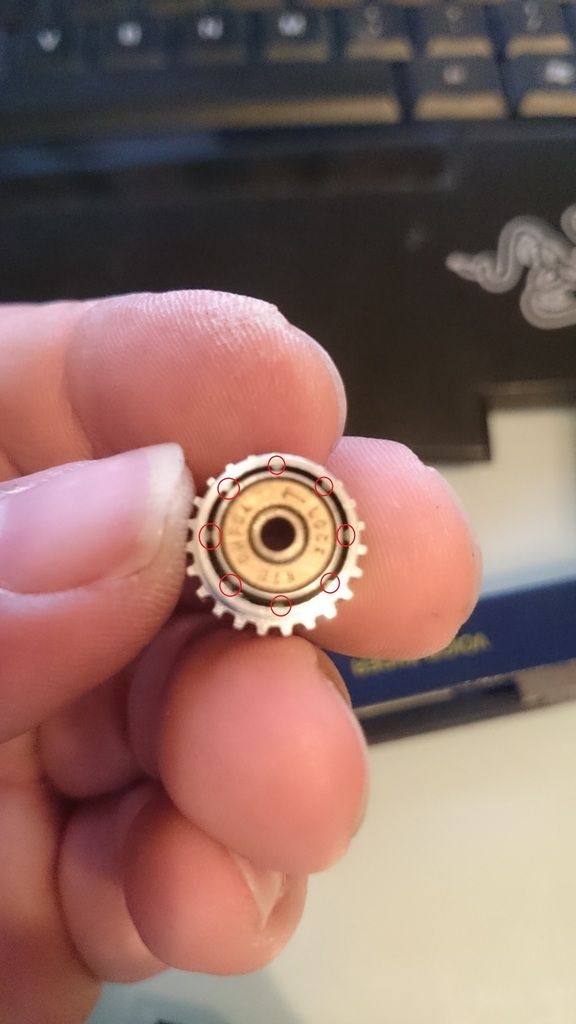
Bearing is a one way direction bearing part no. NTN NHF04
The reason the trigger winder stops advancing film is because the sleeve (made from aluminium) has worn off.
Slipping whenever the trigger is pulled.
Highlighting in red where sleeve makes contact with the bearing.
Simple fix is to cut a piece of plastic to use as a shim.
Place the plastic shim against the bearing housing and slide the sleeve back over it tightly.
Trim the access plastic and reassemble the trigger winder back together.
It's low tech and simple. No more slipping and film advance works.
Recently repaired my trigger winder and taken some pictures of the teardown.
Hope someone finds the pictures useful because there's not much information available online on taking one apart.
Peel back the stuck on covering and keep aside.
The tape backing is very tacky and can be reused.
Remove screws marked in red.
Remove single screw at the bottom.
Removing the top plate revealing winder innards.
Highlighting gear and bearing assembly.
In background is corresponding pin that holds the gear and bearing assembly in place.
Closer look of gear and bearing assembly.
The assembly comes apart by sliding the sleeves off the bearing.
Bearing is a one way direction bearing part no. NTN NHF04
The reason the trigger winder stops advancing film is because the sleeve (made from aluminium) has worn off.
Slipping whenever the trigger is pulled.
Highlighting in red where sleeve makes contact with the bearing.
Simple fix is to cut a piece of plastic to use as a shim.
Place the plastic shim against the bearing housing and slide the sleeve back over it tightly.
Trim the access plastic and reassemble the trigger winder back together.
It's low tech and simple. No more slipping and film advance works.
farlymac
PF McFarland
Excellent information to know. Any idea of the thickness of the plastic shim you made?
PF
PF
Rapidwinder.com can fix a Rapidwinder for you.
Stephen
Stephen
B-9
Devin Bro
Do they repair Voigtlander winders? Just curious.
Do they repair Voigtlander winders? Just curious.
Nope.
The Voigtlander winders were made by Voigtlander.
moving this to the Voigtlander forum.
Share:
-
This site uses cookies to help personalise content, tailor your experience and to keep you logged in if you register.
By continuing to use this site, you are consenting to our use of cookies.