
TVphotog
Television Grunt
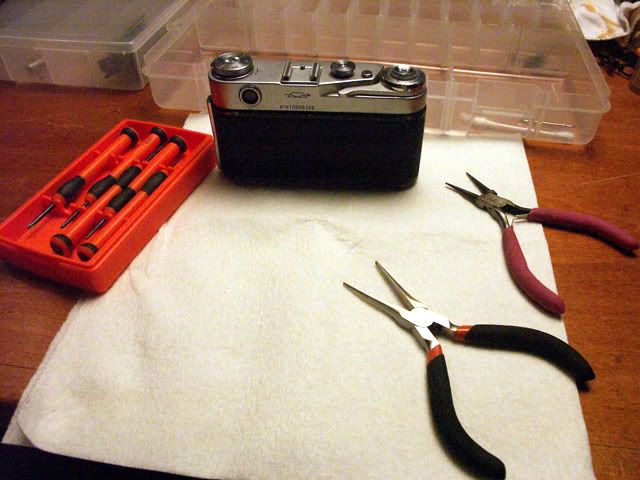
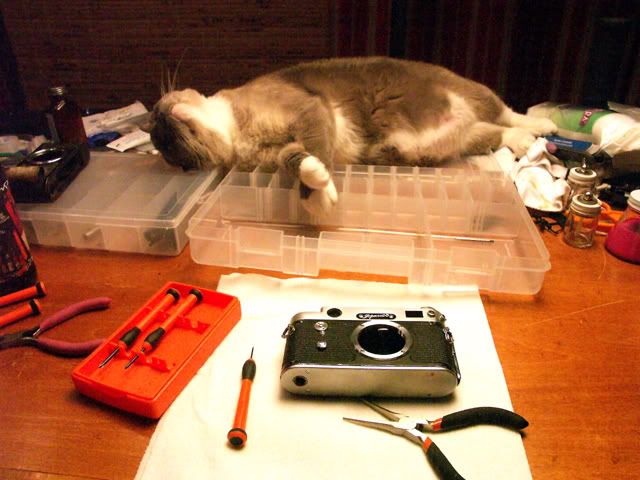
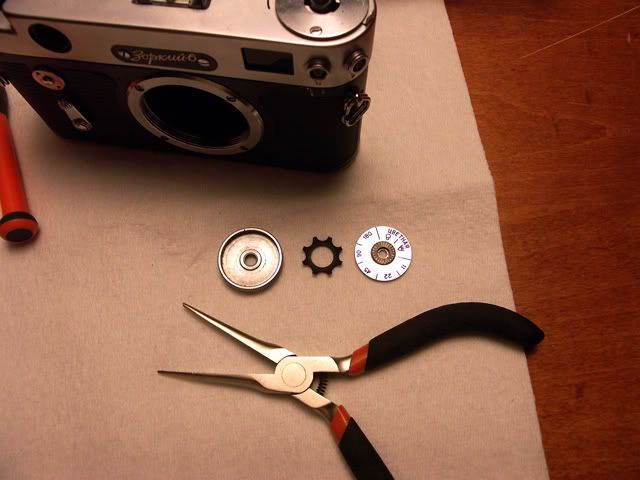
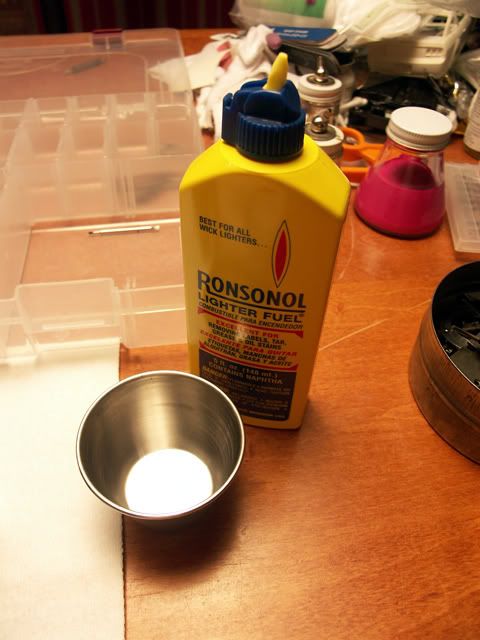
Like any other CLA, you must gather the right tools. Few small screwdrivers. I use a 1.4mm, a 2.0mm and a 2.4 mainly. For the Zorki 6 you will really only need two sets of pliers. Normal needle nose and round jaw needle nose pliers. Also, I cover my work area with a couple of paper towels folded over. They seem to cushion enough to prevent small parts from flying off into the abyss.
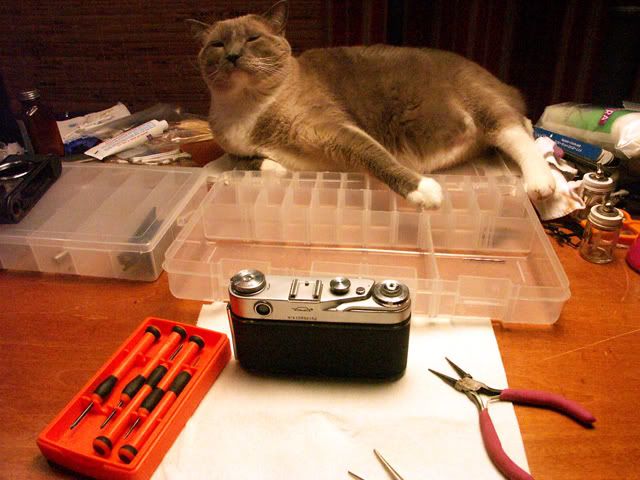
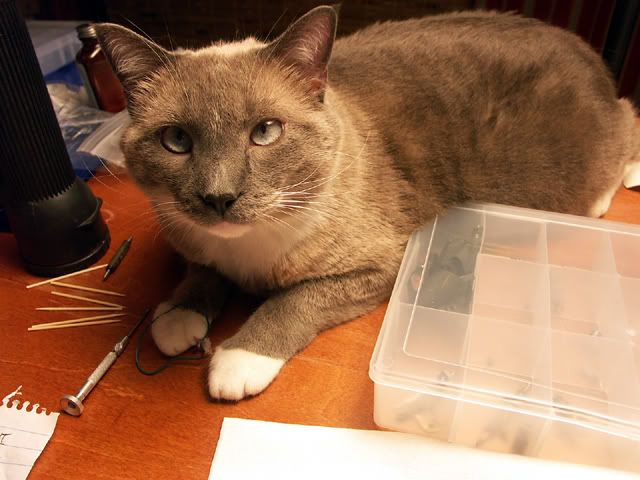
You will also need a multi-sectioned container to keep all the parts separate. It would be advisable to make sure if you are blessed with a helper, like I am, that they are comfortable enough for the duration. Mine was a slacker and eventually fell asleep, but more on that later.
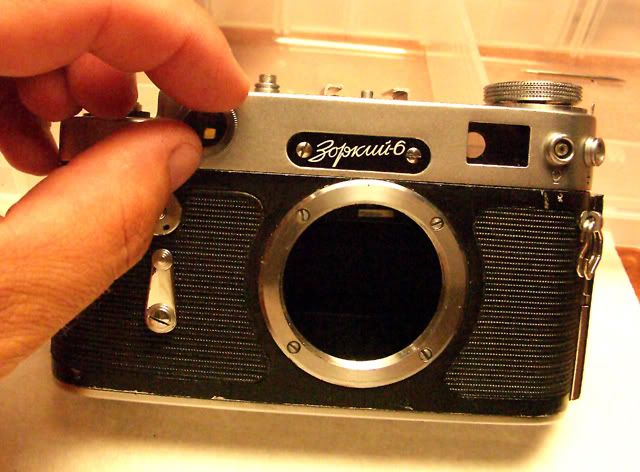
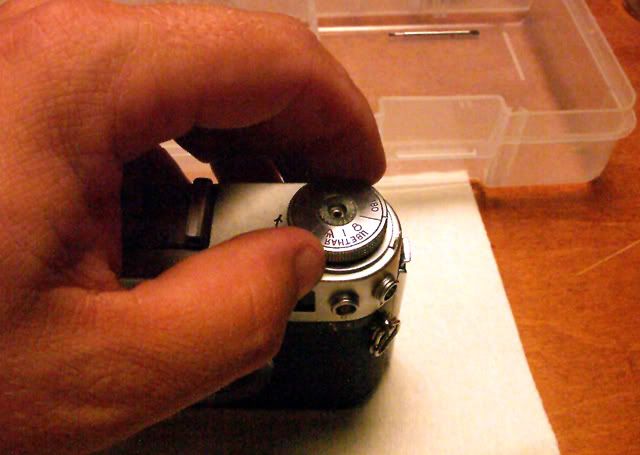
First on the removal list is the top casing. I start with the frame counter and the speed dial. The Frame counter is LEFT HAND THREADED. This means you must turn it to the right to loosen it. Turning left, while cool in NASCAR, will just frustrate you in a CLA.
The speed dial is held on with two grub screws. Like every other grub screw in FSUdom history, they are made of melted butter. Be very careful with them. I just loosen them enough to remove the speed dial.
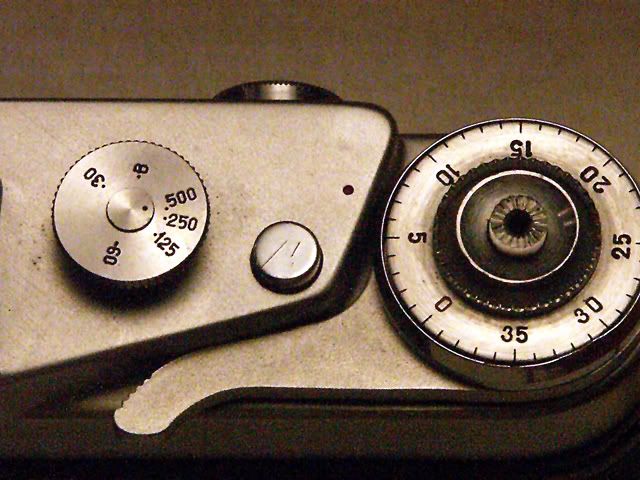
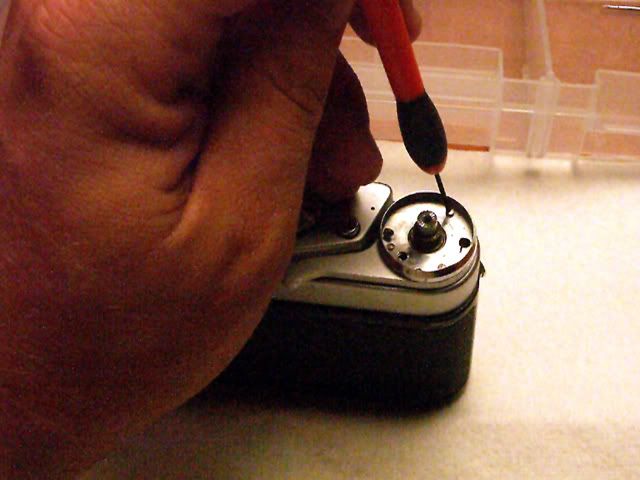
Under the frame counter dial you will find a round keeper nut (for lack of a better sounding technical name) This as well is LEFT HAND THREADED. Unscrew this to the right as well. I use my round jaw pliers for this operation.
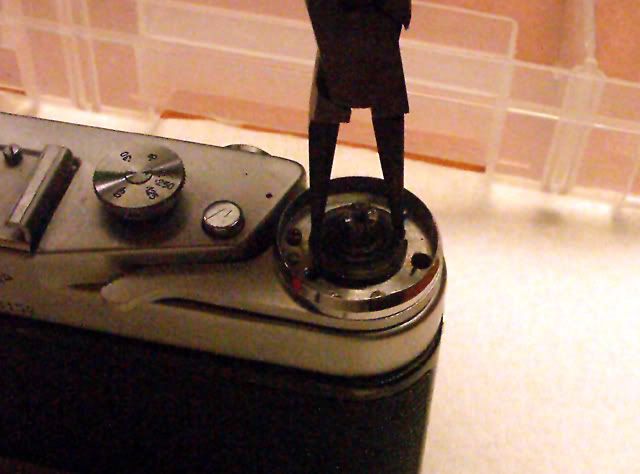
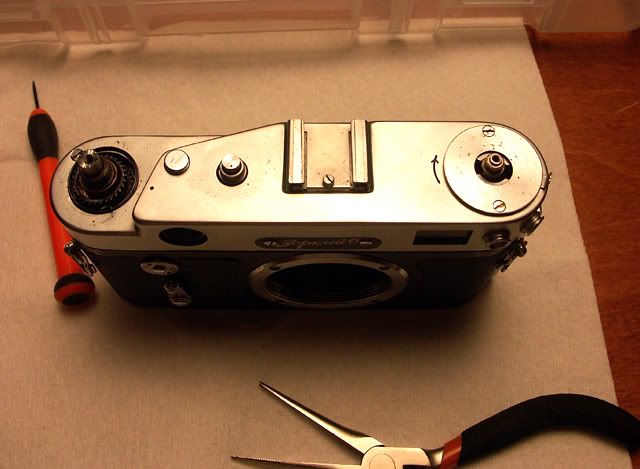
Next, take out the three screws holding the advance lever in place. You will also need to push the tension spring down into its hole. I use the 1.4mm screwdriver to do this. Once both of these tasks are completed the advance lever will just lift off. Well, not really lift, as you may have to wiggle it a bit.
The VF (viewfinder) eyepiece is next. Just unscrew it and put it some place safe.
The RF (rangefinder) window is next. It unscrews in the normal manner. Mine unscrewed quite easily, yours may not. If it doesn’t, try some cleaning fluid or mineral spirits to loosen the glue holding it in place. If it comes off, but leaves the underlying RF window in place, just use some smaller screwdrivers to remove it. You can also try to make a tool for this from some soft metal or such. Like I said, I was lucky and mine just unscrewed with a couple of fingers.
Okay, we are really close and the rest is downhill from here. Step back, breathe deeply, fortify yourself with your favorite adult beverage. If need be, wake your helper and lets forge ahead.
The rewind knob comes off quickly. Just undo the screw on top. Then open the back and while holding onto the rewind forks, unscrew the knob from above.
Remember what was under the rewind knob cover and the order they were in. Set them aside and continue onward.
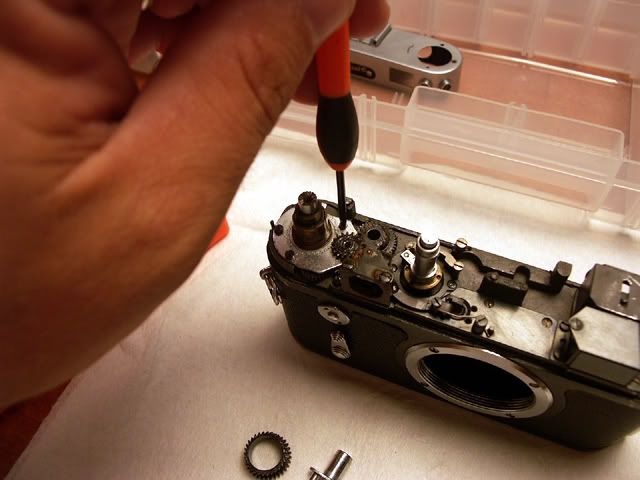
Now, just undue the three screws seen here. There is one by the advance lever boss and two on the rewind knob base. Once those are undone, there is still one more under the base that the rewind knob sits on. With that last screw removed the top casing will wiggle off. As you are removing the top casing, the diopter slide will also wiggle out. Usually, the advance tension spring will lift away with the top casing as well.
Okay, congratulate yourself and your helper. If you are just trying to work/clean the RF/VF workings you can stop here. If you are planning on CLA-ing the entire thing, read on.
You will also need a multi-sectioned container to keep all the parts separate. It would be advisable to make sure if you are blessed with a helper, like I am, that they are comfortable enough for the duration. Mine was a slacker and eventually fell asleep, but more on that later.
First on the removal list is the top casing. I start with the frame counter and the speed dial. The Frame counter is LEFT HAND THREADED. This means you must turn it to the right to loosen it. Turning left, while cool in NASCAR, will just frustrate you in a CLA.
The speed dial is held on with two grub screws. Like every other grub screw in FSUdom history, they are made of melted butter. Be very careful with them. I just loosen them enough to remove the speed dial.
Under the frame counter dial you will find a round keeper nut (for lack of a better sounding technical name) This as well is LEFT HAND THREADED. Unscrew this to the right as well. I use my round jaw pliers for this operation.
Next, take out the three screws holding the advance lever in place. You will also need to push the tension spring down into its hole. I use the 1.4mm screwdriver to do this. Once both of these tasks are completed the advance lever will just lift off. Well, not really lift, as you may have to wiggle it a bit.
The VF (viewfinder) eyepiece is next. Just unscrew it and put it some place safe.
The RF (rangefinder) window is next. It unscrews in the normal manner. Mine unscrewed quite easily, yours may not. If it doesn’t, try some cleaning fluid or mineral spirits to loosen the glue holding it in place. If it comes off, but leaves the underlying RF window in place, just use some smaller screwdrivers to remove it. You can also try to make a tool for this from some soft metal or such. Like I said, I was lucky and mine just unscrewed with a couple of fingers.
Okay, we are really close and the rest is downhill from here. Step back, breathe deeply, fortify yourself with your favorite adult beverage. If need be, wake your helper and lets forge ahead.
The rewind knob comes off quickly. Just undo the screw on top. Then open the back and while holding onto the rewind forks, unscrew the knob from above.
Remember what was under the rewind knob cover and the order they were in. Set them aside and continue onward.
Now, just undue the three screws seen here. There is one by the advance lever boss and two on the rewind knob base. Once those are undone, there is still one more under the base that the rewind knob sits on. With that last screw removed the top casing will wiggle off. As you are removing the top casing, the diopter slide will also wiggle out. Usually, the advance tension spring will lift away with the top casing as well.
Okay, congratulate yourself and your helper. If you are just trying to work/clean the RF/VF workings you can stop here. If you are planning on CLA-ing the entire thing, read on.
Last edited:
TVphotog
Television Grunt
Okay, since we are planning on cleaning all the gears and such, get some cleaning fluid. I prefer lighter fluid. You may like something else. I also steal these small metal condiment cups from my wife to make my bath from. I do wash them out really well when I am done with them. So far she has yet to catch on…
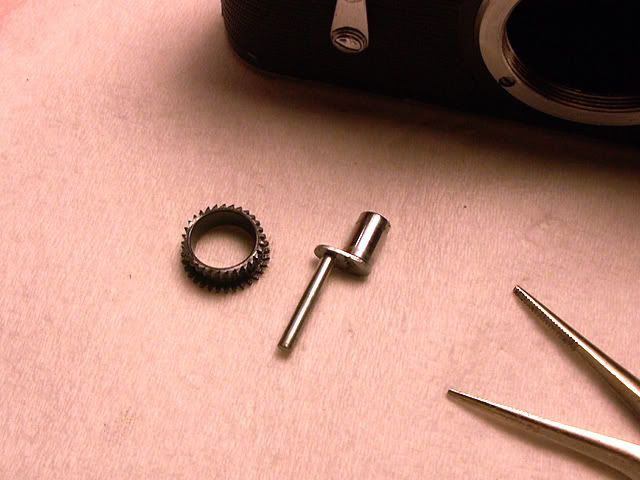
The rewind button (or shutter button depending how you use it) and the advance gear just lift off and go into the bath.
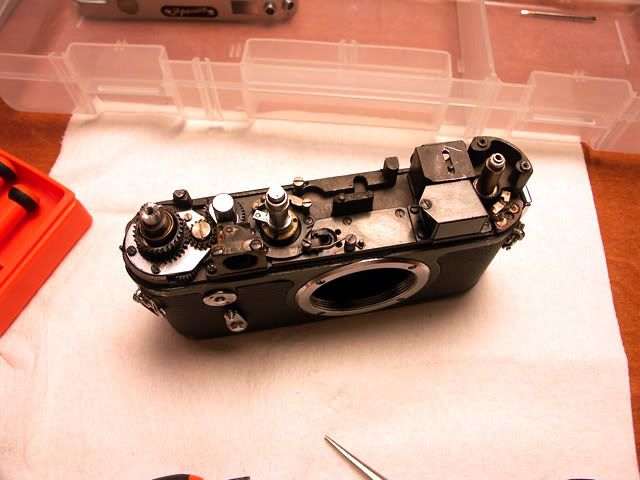
Next undo the four screws holding the advance lever boss in place. On some Z6s there is a small metal flange, which covers the hinge for the back attached to one of these screws. It was on one of mine and not on the other. Either way, set the screws and the flange, if present aside and drop the entire boss into the bath. You may wish to remove the gear attached to this plate. I did not this time, but it is just screwed on if you so desire.
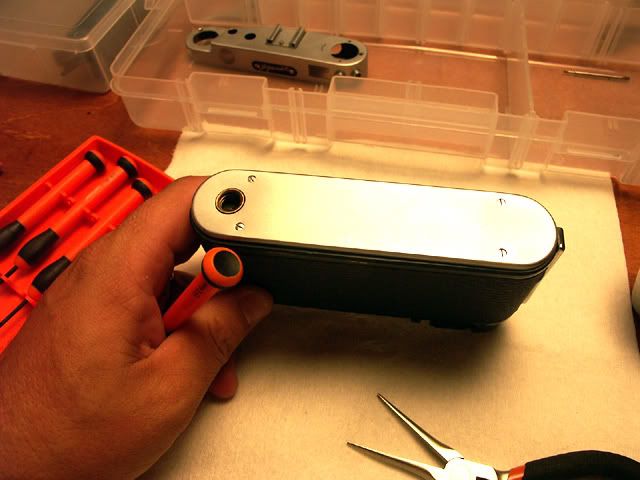
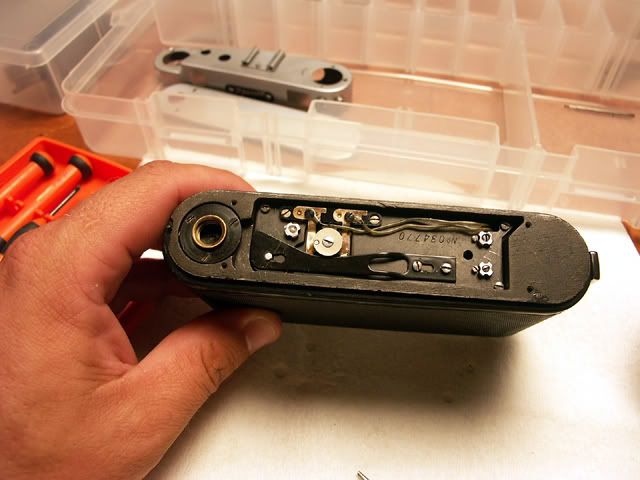
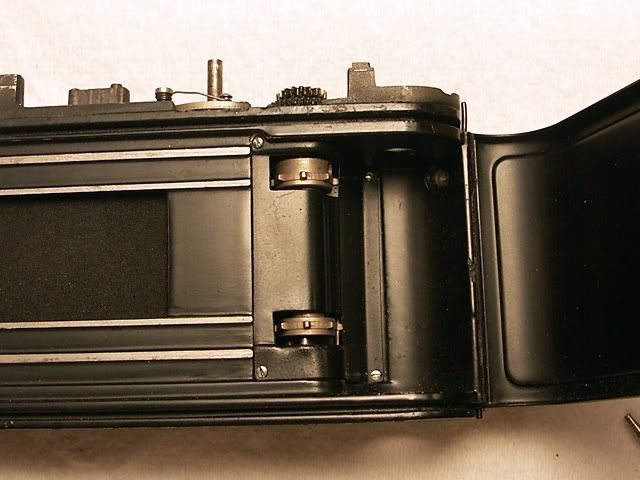
Now flip the camera over and lets remove that base. Just unscrew the four screws holding it on and lift it away.
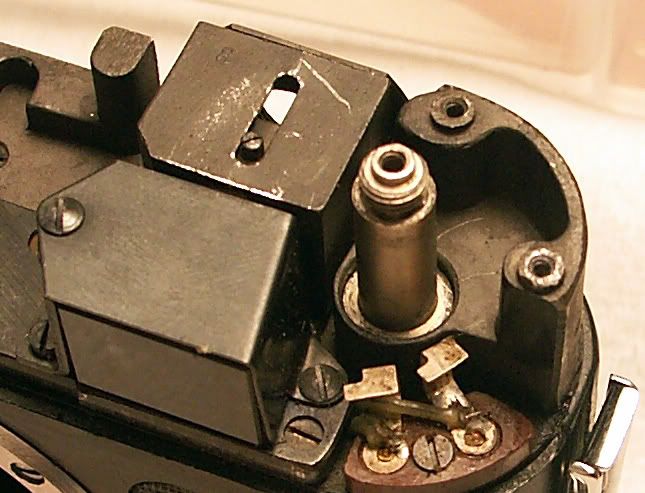
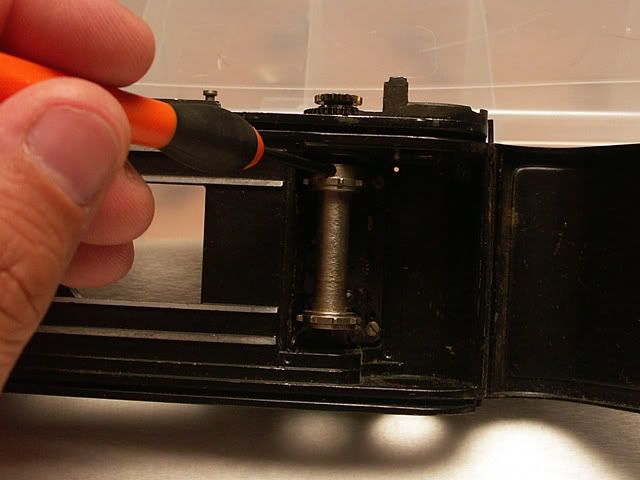
This is where we start to get into the guts. First we remove the boss holding the take up spool in place. Just unscrew the three screws holding it in place. You may need to remove the boss with a pair of pliers. On this camera I need to work at it with the needle nose pliers just a bit to get it started.
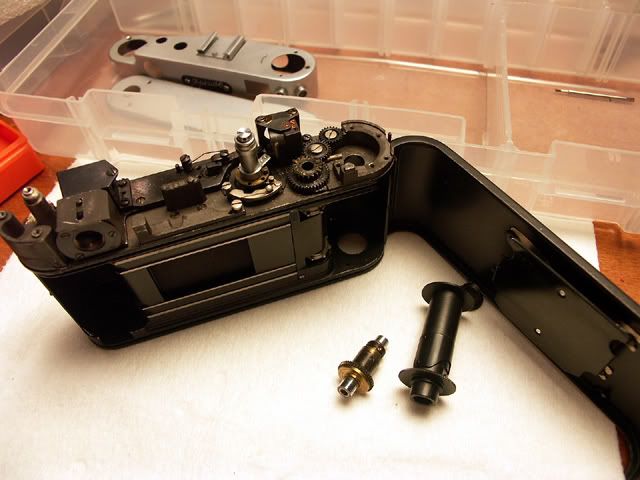
Next, unscrew the long screw holding the take up spool in the camera. I used a small standard screwdriver for this. You may be able to get yours out easier or you may not. Sometimes it may help to hold the advance stud/boss on the top of the camera to prevent it from spinning.
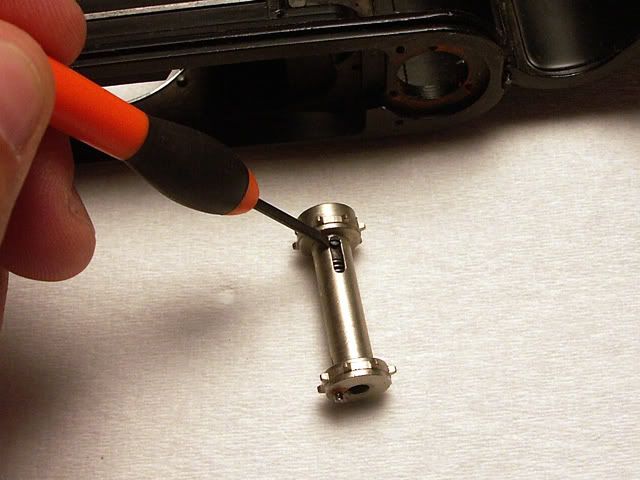
Open the back of the camera and remove the take-up spool and the advance stud/boss above it You may wish to dismantle the shutter button from the advance stud/boss. It is quite simply held in place with two grub screws. Undo them and the parts will fall out. I have found that it is not necessary to completely dismantle this part. A long soak in the cleaning bath is usually sufficient.
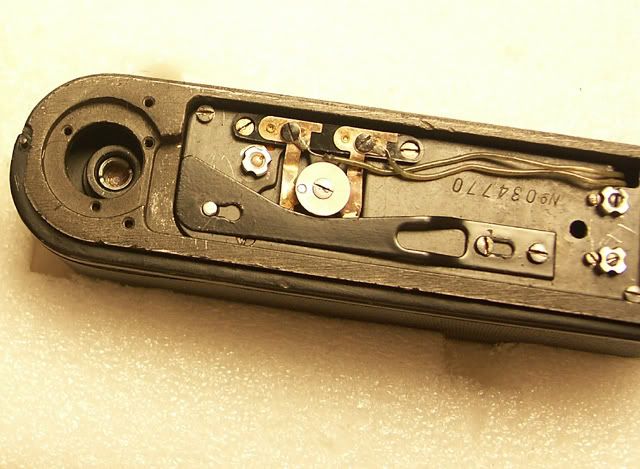
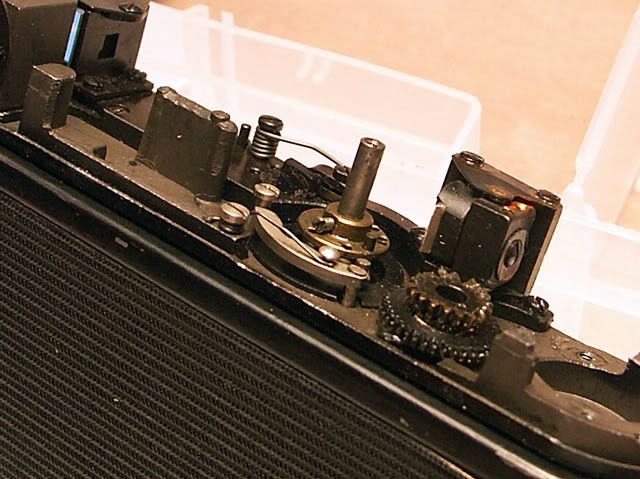
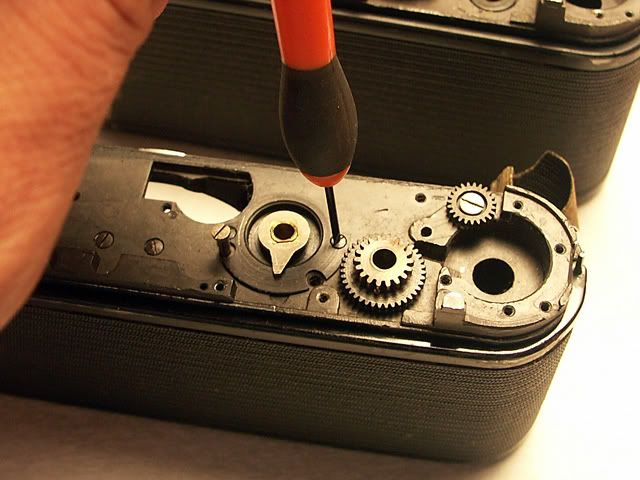
There are two small gears next to the advance lever station. You can remove these or just leave them be. If you chose to remove them beware!!!! There is a small lever underneath the middle gear. It may or may not slide out when you turn the camera over. Mine was so gunked up it stayed put. We will be removing it this time, as it tends to get in the way if you don’t.
The speed dial indicator is removed next. You can use a pair of pliers to remove it. It can also be removed with a piece of stiff wire. There is a small hole that goes through the indicator. Just slide your wire through this and twist. There will be a small spring underneath this. You may not be able to get at it until you lift the speed selector off. Again, as with everything else, clean the spring and such.
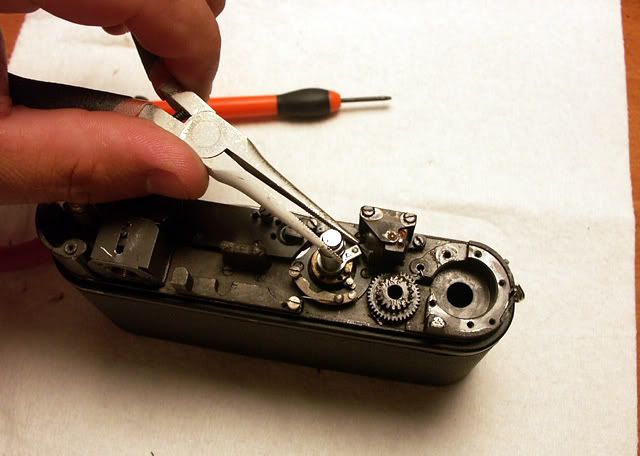
The brass shutter speed regulator unscrews as well. It is a long small screw, so keep at it. You may need to remove the arm in front before you can get the screw out. I did not need to on either of my Z6s. Just gently grab the regulator with your needle nose pliers and lift it off.
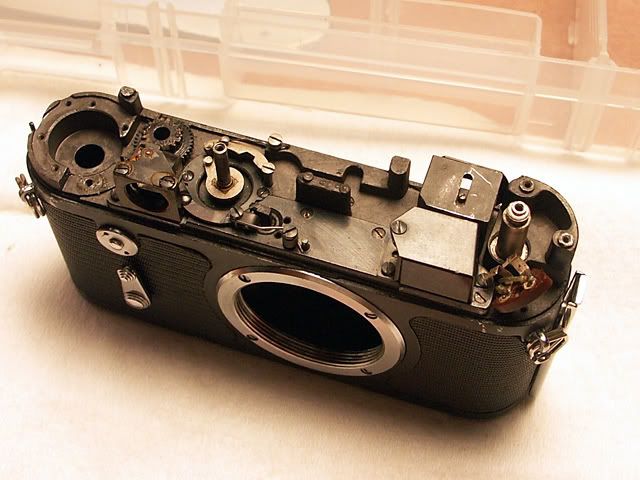
Now we remove the top two flash synch connections. On my older model, the contacts actually clip to the flash sockets. In this one, the sockets just rested on these two metal plates. They were held to the camera frame with just the one screw. When you remove the screw, the flash synch wires will not come out, but just come loose. Don’t worry we will remove them shortly. I never use a flash with these guys, so I never replace them. If you plan on using a flash with this camera, just remember how they were attached.
Now we remove the RF/VF assembly. It is held in place with four screws. One screw on the front of the assembly, next to the flash connections. Two in the middle towards the back, and one more on the other side of the RF window. Once you have the screws removed, start wiggling the assembly. The RF cam will come out with the assembly, but you need to work it out slowly, so as to not bend the cam.
[FONT="]
 [/FONT]
The rewind button (or shutter button depending how you use it) and the advance gear just lift off and go into the bath.
Next undo the four screws holding the advance lever boss in place. On some Z6s there is a small metal flange, which covers the hinge for the back attached to one of these screws. It was on one of mine and not on the other. Either way, set the screws and the flange, if present aside and drop the entire boss into the bath. You may wish to remove the gear attached to this plate. I did not this time, but it is just screwed on if you so desire.
Now flip the camera over and lets remove that base. Just unscrew the four screws holding it on and lift it away.
This is where we start to get into the guts. First we remove the boss holding the take up spool in place. Just unscrew the three screws holding it in place. You may need to remove the boss with a pair of pliers. On this camera I need to work at it with the needle nose pliers just a bit to get it started.
Next, unscrew the long screw holding the take up spool in the camera. I used a small standard screwdriver for this. You may be able to get yours out easier or you may not. Sometimes it may help to hold the advance stud/boss on the top of the camera to prevent it from spinning.
Open the back of the camera and remove the take-up spool and the advance stud/boss above it You may wish to dismantle the shutter button from the advance stud/boss. It is quite simply held in place with two grub screws. Undo them and the parts will fall out. I have found that it is not necessary to completely dismantle this part. A long soak in the cleaning bath is usually sufficient.
There are two small gears next to the advance lever station. You can remove these or just leave them be. If you chose to remove them beware!!!! There is a small lever underneath the middle gear. It may or may not slide out when you turn the camera over. Mine was so gunked up it stayed put. We will be removing it this time, as it tends to get in the way if you don’t.
The speed dial indicator is removed next. You can use a pair of pliers to remove it. It can also be removed with a piece of stiff wire. There is a small hole that goes through the indicator. Just slide your wire through this and twist. There will be a small spring underneath this. You may not be able to get at it until you lift the speed selector off. Again, as with everything else, clean the spring and such.
The brass shutter speed regulator unscrews as well. It is a long small screw, so keep at it. You may need to remove the arm in front before you can get the screw out. I did not need to on either of my Z6s. Just gently grab the regulator with your needle nose pliers and lift it off.
Now we remove the top two flash synch connections. On my older model, the contacts actually clip to the flash sockets. In this one, the sockets just rested on these two metal plates. They were held to the camera frame with just the one screw. When you remove the screw, the flash synch wires will not come out, but just come loose. Don’t worry we will remove them shortly. I never use a flash with these guys, so I never replace them. If you plan on using a flash with this camera, just remember how they were attached.
Now we remove the RF/VF assembly. It is held in place with four screws. One screw on the front of the assembly, next to the flash connections. Two in the middle towards the back, and one more on the other side of the RF window. Once you have the screws removed, start wiggling the assembly. The RF cam will come out with the assembly, but you need to work it out slowly, so as to not bend the cam.
[FONT="]
TVphotog
Television Grunt
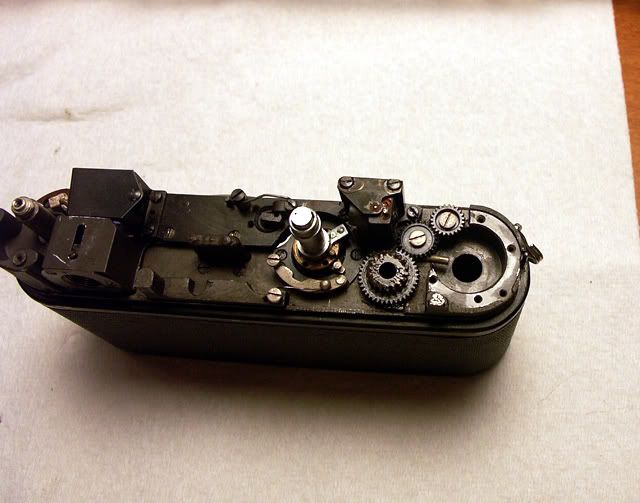
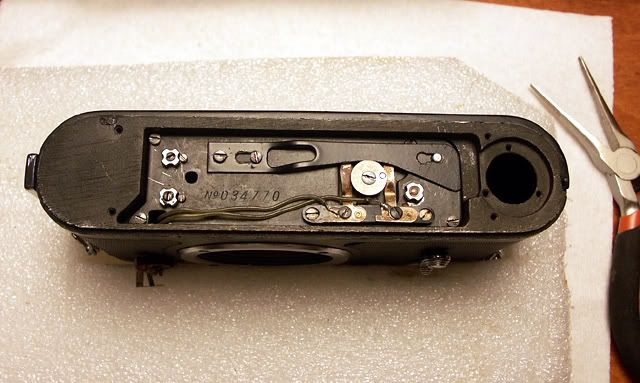
Now turn the camera over and open the back. We need to remove the cover over the film advance gears. Just undo the four small, almost microscopic screws holding it in place and set it aside. At this point, you can remove the small arm that resides under the gears on the top of the camera frame. It runs down through the camera next to the film advance sprocket and is easily seen (though, not pictured) and dealt with now.
Here is where it gets interesting and frustrating. Although, the frustration really comes into play when you try to put it back together, but I am getting ahead of myself. Remove the two screws holding the long thin metal piece (this is the shutter button return spring) Careful as you do this. The screws attach to a flat piece that traps the shutter frame inside the shutter crate. This may fall out, mine did and it took a couple of minutes to figure out where it came from.
Next, undue the two screws holding the flash synch wires in place. You may now withdraw them from the camera by feeding them up through the shutter crate to the top if your camera is like this one. You might also be able to pull them out the bottom if they are like the ones in my '61 Z6. You can also leave them in place if you wish to use a flash later. You will also need to remove the bar that they screw into.
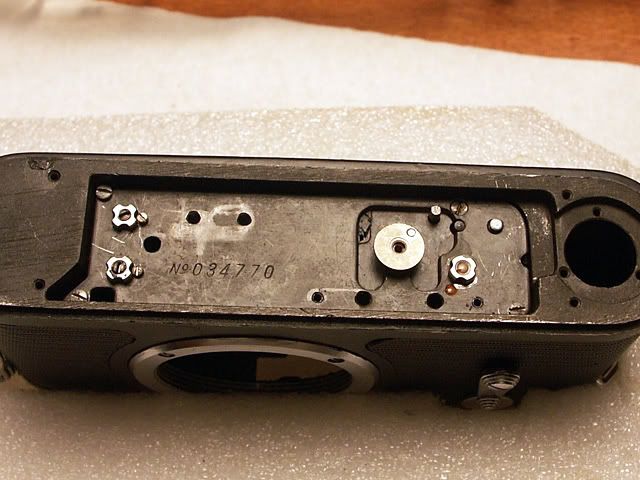
Unscrew the small metal disk as well. Make sure to note its position in relation to the camera frame and the shutter as if you do not return it to this position exactly, your flash will not operate. I do not care for flashes, so I made no such notes…
Now, if you wish, we will disassemble the actual shutter. If you do not need to remove the shutter don’t. It is a pain to get it all lined up properly and get everything back in there. Remember, you have to reassemble it upside down. Trust me; if you don’t need to remove the shutter skip ahead.
Undo the keeper screws and the retaining nuts on the shutter. If you have never tensioned a shutter, do this slowly and keep count of the turns needed to fully loosen the shafts. Use a pair of pliers (round jaw needle nose work great) to hold the nuts as you back off the tension. This whole assembly is backwards. The nuts turn clockwise to loosen, while the shafts turn in the opposite direction as the shutter travels. Once the tension has been removed from the shutter shafts and you have removed the retaining nuts, remove the four screws holding the shutter crate base plate in location.
You can now remove the shutter crate base plate. Gaze in wide wonder at the joy you have found. You may now remove the shutter curtains. They just lift out… Oh Yeah, notice my helper has fallen asleep once again. He is such a SLACKER!!!!
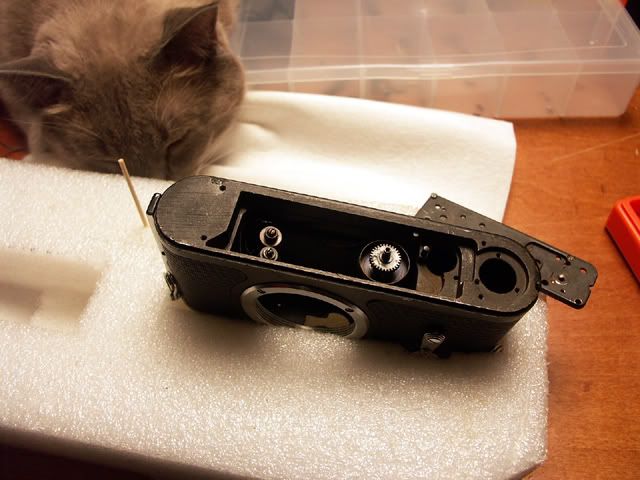
The sight of a Zorki/FED shutter in all its glory amazed even my helper
Now lay the camera down on its face and open the back. Turn the film advance gear until you see a large black screw above the sprocket. Loosen this just a touch. I think I had to turn mine twice. Then slide the sprocket down and off the spindle. The spindle it mounts on will lift out from the top.
If you wish to clean the spring out, it needs to come out. There is another of the dreaded grub screws holding the keeper in place. Unscrew it and the keeper will slide out the top followed by the spring. If you are unlucky like me, the spring will jettison the keeper halfway across the room. It might be a good idea to place a finger above it to ease it out.
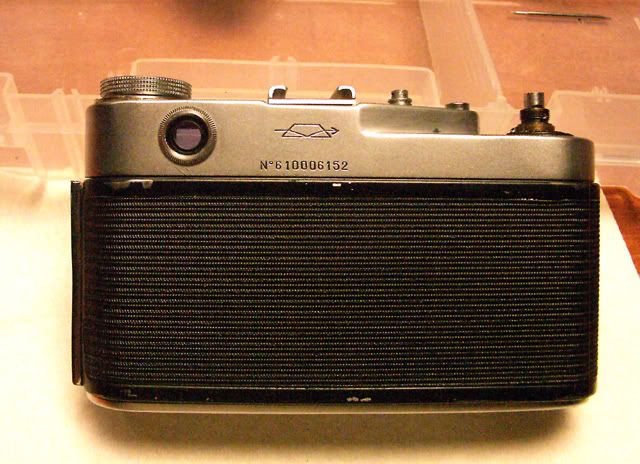
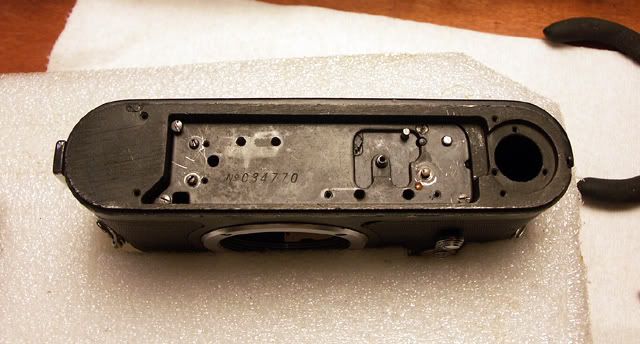
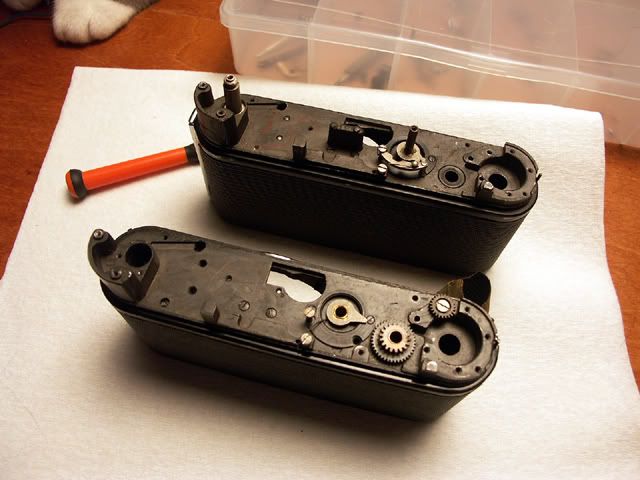
Now, flip the camera upright again. Since there has been much discussion about when changes came into effect in the FSU camera industry, I set up this example. The frame nearest the camera is a ’61 model. The farthest is a 64 model. There are subtle differences that would need another thread to discuss, but there are some quite obvious.
On the ’61 the rewind forks are mounted with a couple of screws. On the ’64 I still haven’t figured out how to remove them completely. Also on the ’64 there is a weird protrusion on the top of the frame just behind where the VF/RF mounts. I have no idea what it is for. Also there is a small divot under the second curtain arm mount. There is a small spring that mounts to this and keeps a small flange pressed against the advance gears. I have no idea of the purpose of this flange. Anyway, we are almost done so pardon the off target discussion
The last thing to remove is the second curtain arm and mount. If you have removed the shutter you need to remove this part as it makes it much easier to get the shutter back in if this is not in the way. Once again, just simply unscrew it and lift it off. I am showing this step on the ’61 model rather than the ’64, which has been the test mule for this shoot, mainly because it was closer to me at this point. You can also choose to remove the retaining spring for the shutter catch if you wish. I did on the ’61 and did not on the ’64. When you remove the shutter catch retaining spring, the shutter catch will of course come out as well.
You have now killed a Zorki 6. It is up to you if it comes back from the dead or not. One of mine will return unharmed. The other (’61) is undergoing several modifications that necessitate it being out of service for a while.
[FONT="]If you have any questions, do not hesitate to ask. As this is my first Zorki CLA thread I am sure that I have missed some steps. If somebody sees something that needs clarification let me know. [/FONT]
Here is where it gets interesting and frustrating. Although, the frustration really comes into play when you try to put it back together, but I am getting ahead of myself. Remove the two screws holding the long thin metal piece (this is the shutter button return spring) Careful as you do this. The screws attach to a flat piece that traps the shutter frame inside the shutter crate. This may fall out, mine did and it took a couple of minutes to figure out where it came from.
Next, undue the two screws holding the flash synch wires in place. You may now withdraw them from the camera by feeding them up through the shutter crate to the top if your camera is like this one. You might also be able to pull them out the bottom if they are like the ones in my '61 Z6. You can also leave them in place if you wish to use a flash later. You will also need to remove the bar that they screw into.
Unscrew the small metal disk as well. Make sure to note its position in relation to the camera frame and the shutter as if you do not return it to this position exactly, your flash will not operate. I do not care for flashes, so I made no such notes…
Now, if you wish, we will disassemble the actual shutter. If you do not need to remove the shutter don’t. It is a pain to get it all lined up properly and get everything back in there. Remember, you have to reassemble it upside down. Trust me; if you don’t need to remove the shutter skip ahead.
Undo the keeper screws and the retaining nuts on the shutter. If you have never tensioned a shutter, do this slowly and keep count of the turns needed to fully loosen the shafts. Use a pair of pliers (round jaw needle nose work great) to hold the nuts as you back off the tension. This whole assembly is backwards. The nuts turn clockwise to loosen, while the shafts turn in the opposite direction as the shutter travels. Once the tension has been removed from the shutter shafts and you have removed the retaining nuts, remove the four screws holding the shutter crate base plate in location.
You can now remove the shutter crate base plate. Gaze in wide wonder at the joy you have found. You may now remove the shutter curtains. They just lift out… Oh Yeah, notice my helper has fallen asleep once again. He is such a SLACKER!!!!
The sight of a Zorki/FED shutter in all its glory amazed even my helper
Now lay the camera down on its face and open the back. Turn the film advance gear until you see a large black screw above the sprocket. Loosen this just a touch. I think I had to turn mine twice. Then slide the sprocket down and off the spindle. The spindle it mounts on will lift out from the top.
If you wish to clean the spring out, it needs to come out. There is another of the dreaded grub screws holding the keeper in place. Unscrew it and the keeper will slide out the top followed by the spring. If you are unlucky like me, the spring will jettison the keeper halfway across the room. It might be a good idea to place a finger above it to ease it out.
Now, flip the camera upright again. Since there has been much discussion about when changes came into effect in the FSU camera industry, I set up this example. The frame nearest the camera is a ’61 model. The farthest is a 64 model. There are subtle differences that would need another thread to discuss, but there are some quite obvious.
On the ’61 the rewind forks are mounted with a couple of screws. On the ’64 I still haven’t figured out how to remove them completely. Also on the ’64 there is a weird protrusion on the top of the frame just behind where the VF/RF mounts. I have no idea what it is for. Also there is a small divot under the second curtain arm mount. There is a small spring that mounts to this and keeps a small flange pressed against the advance gears. I have no idea of the purpose of this flange. Anyway, we are almost done so pardon the off target discussion
The last thing to remove is the second curtain arm and mount. If you have removed the shutter you need to remove this part as it makes it much easier to get the shutter back in if this is not in the way. Once again, just simply unscrew it and lift it off. I am showing this step on the ’61 model rather than the ’64, which has been the test mule for this shoot, mainly because it was closer to me at this point. You can also choose to remove the retaining spring for the shutter catch if you wish. I did on the ’61 and did not on the ’64. When you remove the shutter catch retaining spring, the shutter catch will of course come out as well.
You have now killed a Zorki 6. It is up to you if it comes back from the dead or not. One of mine will return unharmed. The other (’61) is undergoing several modifications that necessitate it being out of service for a while.
[FONT="]If you have any questions, do not hesitate to ask. As this is my first Zorki CLA thread I am sure that I have missed some steps. If somebody sees something that needs clarification let me know. [/FONT]
Last edited:
Spyderman
Well-known
I just finished doing CLA on mine, and I must say that Z-6s were manufactured to a surprisingly high standard. Although the mechanics is simple, the parts seem to be quite precise and nicely machined.
The CLA taught me one thing: NOT to use tissues for cleaning. A piece of tissue got stuck in the shutter shutter release shaft, and it took me a couple of hours (it included complete assembly and disassembly for a few times, wondering "what the #&@{ could be wrong with it") to realize it and to remove the piece.
Thank God now it's working like a charm again.
fanshaw
Well-known
This is great! A really clear guide for one of the trickier Soviet RFs. Thanks for posting it.
Could you give more information about how to undo the nut on the counter dial? It seems very difficult to grip with anything as it is only slightly raised above the dial. This seems to me to be the most difficult step in the whole operation.
Could you give more information about how to undo the nut on the counter dial? It seems very difficult to grip with anything as it is only slightly raised above the dial. This seems to me to be the most difficult step in the whole operation.
Blank288
Established
Thanks for posting - very clear and attractive to read!
I CLA'd my Z6 some months ago. I used Maizenberg as my guide, but your description is handier, I think. I didn't disassemble the complete shutter assembly. That wasn't necessary to get mine smooth and reliably functional again; curtains still are okay.
Indeed the whole assembly appeared well designed and finished, compared to other FSU rangefinders which I dismantled partly or completely (Z1, -3M, -4, Fed-2, 4).
I wasn't aware about differences in design during the Z6-production period. Maizenberg only mentions differences between Z5 and Z6.
Maybe a useful addition: to loosen the round winder and finder nuts on FSU rangefinders, I use a suitable (small but slightly oversized) socket wrench. First I put a sheet of rubber (piece of bicycle inner tyre) over the nut, then I push the socket wrench on it till it fits tightly - this is why the wrench has to be slightly oversized - and start to turn it carefully in the right direction. The rubber grips the nut and 'pulls' it loose.
Eventually it always worked for me, and I never damaged a nut (until now ...).
wolves3012
Mentor
Excellent! Thanks for putting the time in, I know how it feels. Sticky anyone?
rxmd
May contain traces of nut
Seconded the sticky suggestion. Thanks for a clear and well illustrated guide. ")
Ondrej, is the CLA'd Z6 the one from the package from Switzerland?
Ondrej, is the CLA'd Z6 the one from the package from Switzerland?
Spyderman
Well-known
Yes Philipp, it's the one. It already has brand new skin (the same as my 2 Kievs) I'll try to post some tasty photo in "Show of your FSU" thread...
I'll try to post some tasty photo in "Show of your FSU" thread...reagan
hey, they're only Zorkis
Great work, TV and my thanks to you're assistant ... but one small suggestion. When was the last time you CLA'd that cat? His RF/VF definately ain't linin' up and there's obvious slow speed issues. No lack of loyalty, though. :angel:
No lack of loyalty, though. :angel:TVphotog
Television Grunt
Heck, pretty much all he has is slow speeds, except if there are bugs around. He is all about hanging out with me Even waits at the door for me to get home. Great little guy, well, maybe not so little
Even waits at the door for me to get home. Great little guy, well, maybe not so littleTVphotog
Television Grunt
Topping for Wolves and possibly a sticky??? Not tootin my own horn, but I am just saying
brachal
Refrigerated User
A great post. Absolutely should become a sticky.
nzeeman
Well-known
please moderators make this sticky
rxmd
May contain traces of nut
Let's make this sticky if and only if TVPhotog posts another guide on how to get it back together again
Philipp
Philipp
TVphotog
Television Grunt
I think I can do that. The camera is back together is already and has a roll of film in it right now. For some reason, it is taking me forever to get through this roll of film.:bang:
I will see if I can work out a re-assembly sequence for those who need it... myself included.
I will see if I can work out a re-assembly sequence for those who need it... myself included.
TVphotog
Television Grunt
Topping once more hoping for a sticky from the mods... Pretty Please???
rxmd
May contain traces of nut
Where's the reassembly sequence?
Nickfed
Well-known
That's a great sequence of stuff! I have worked on the top of mine, I will now work on the bottom.
Thanks again.
Thanks again.
TVphotog
Television Grunt
Someday I will get to the reassembly sequence. Right now I am having too much fun using the darn thing. If I ever complete the modifications to the other Z6 I have I will post the reassembly sequence of it
Share:
-
This site uses cookies to help personalise content, tailor your experience and to keep you logged in if you register.
By continuing to use this site, you are consenting to our use of cookies.