
lynnb
Mentor
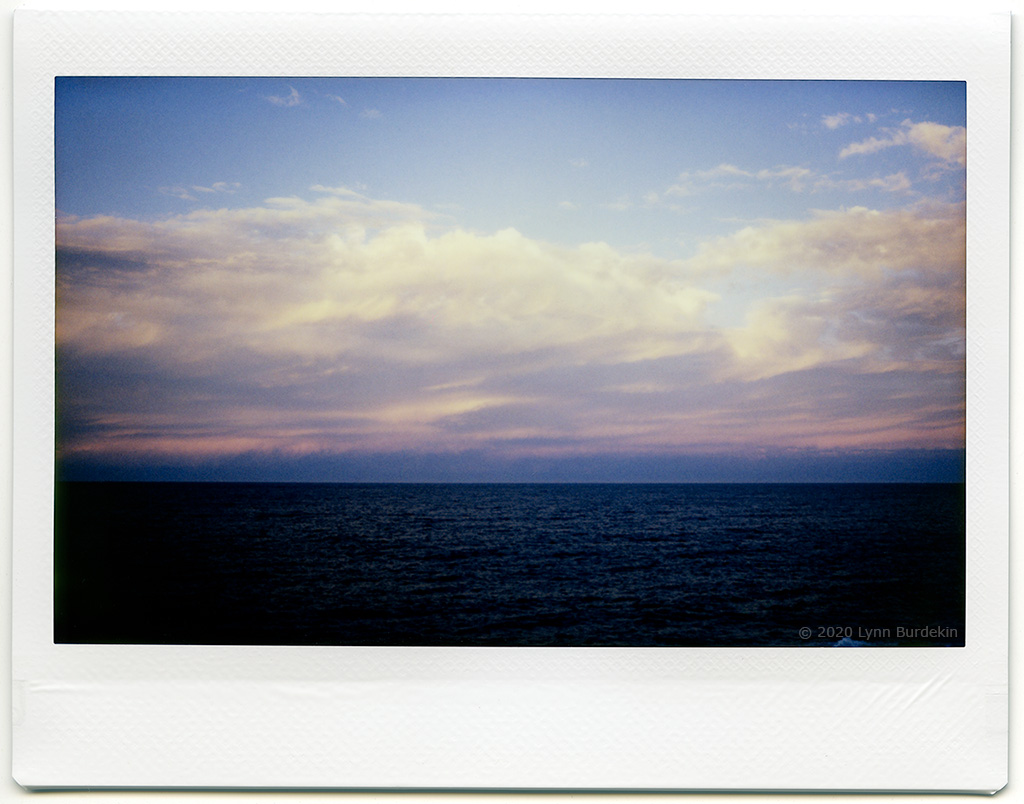
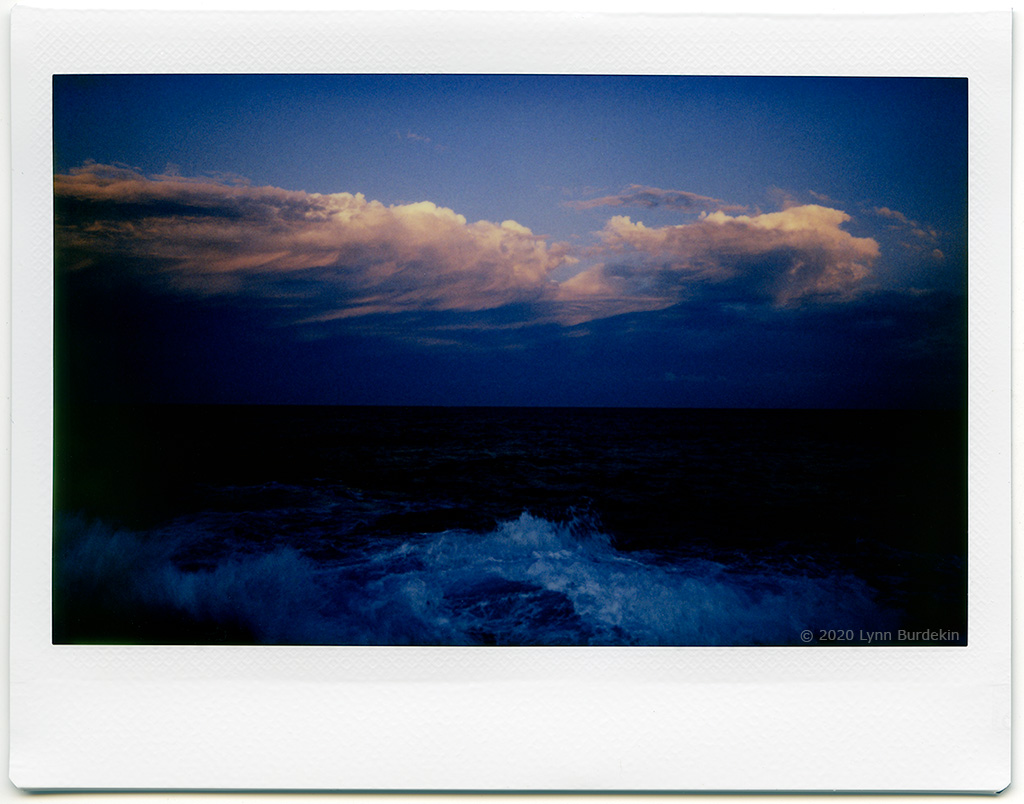
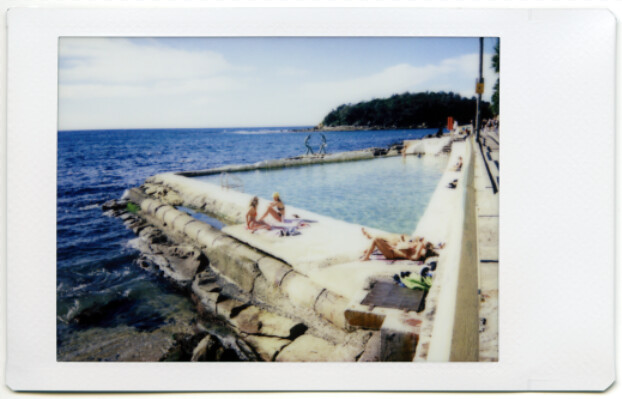
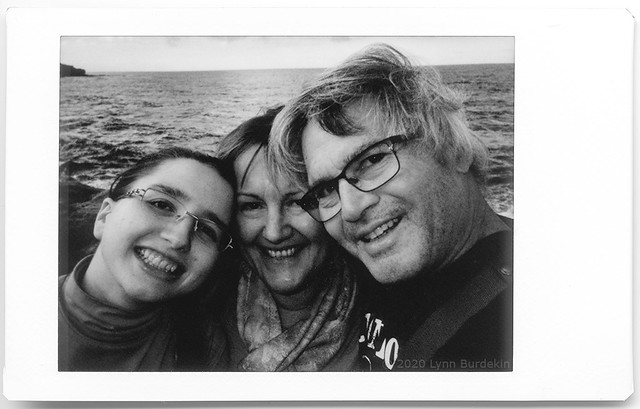
Some low light pictures with the Instax Wide 300. Taken in fading light after sunset looking out over the Pacific ocean. The flash fired in the second picture - I'm not sure if I'd turned it off.
Picture W#036
Picture W#037
Picture W#036
Picture W#037
chipgreenberg
Well-known
Lynn you're really making me want to try this!
lynnb
Mentor
Buy shares in Fujifilm first!Lynn you're really making me want to try this!
Pál_K
Cameras. I has it.
Have you considered the Fuji Neo 90 as a compromise between the two cameras?
https://www.fujifilm.com/products/instant_photo/cameras/instax_mini_90/
According to the specs, flash can be turned off.
https://www.fujifilm.com/products/instant_photo/cameras/instax_mini_90/
According to the specs, flash can be turned off.
lynnb
Mentor
Thanks Pál_K, the flash on the Instax Wide 300 can be turned off.. Brad's question was whether it still fires when the light levels are below the camera's EV range even if you've turned the flash off. I don't have a firm answer on that yet.Have you considered the Fuji Neo 90 as a compromise between the two cameras?
https://www.fujifilm.com/products/instant_photo/cameras/instax_mini_90/
According to the specs, flash can be turned off.
As it turns out I found an Instax SQ6 at half the price of the Neo 90. The SQ6 has more control than the Mini 9 or Wide 300 (and you can turn off the flash), and takes square pictures. That story coming up soon.
Bingley
Mentor
Really lovely images, lynn! A couple of years ago I got a Leica Sofort for Christmas. It shoots instax mini film. I want to use it more but getting the scanning right has been a challenge. How do you scan your Instax Mini prints?
Oren Grad
Well-known
A good thing about the Instax Wide 300 is that you can turn the flash off.
You can force it on - this is the "fill flash" feature - but you can't force it off. The default behavior is for the camera to decide when flash is needed. With the Mini 90, you can force the flash off.
The logic behind this difference is that the Mini 90 can make long exposures - up to 1.8 seconds - while the Wide 300 is limited to 1/64 second, which is a pretty severe constraint for non-flash exposures given its maximum aperture of f/14. Without the flash, the Wide 300 would be entirely out of commission in anything but fairly bright conditions.
I have both cameras, wish the Wide 300 allowed for longer non-flash exposures.
Anyway: enjoying all of the pictures, thanks for sharing!
lynnb
Mentor
Oren: thanks for the explanation. I'm glad I now have the SQ6, which also allows you to force the flash off. The SQ6 shutter goes from 1.6sec to 1/400.
Steve: Thanks! I will do a post shortly with pictures to show my scanning technique.
Steve: Thanks! I will do a post shortly with pictures to show my scanning technique.
robert blu
quiet photographer
Picture #125. I figured one way to get greater impact from the small Instax Mini format is to do a Warhol...
Taken with the close up filter and compiled in CS6.
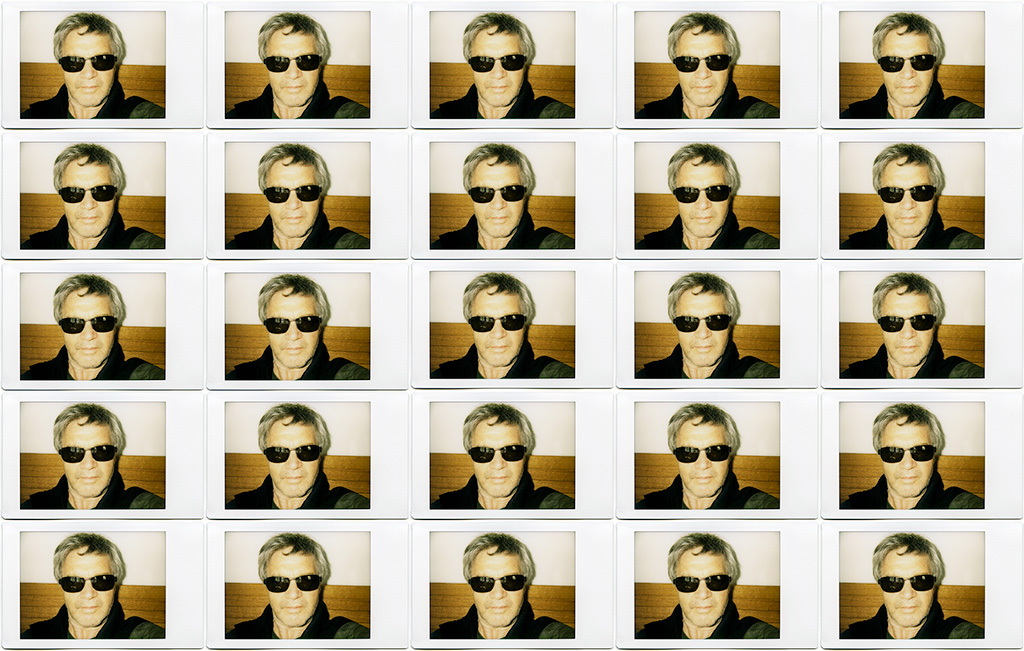
Love so much this Warhol inspired work!
lynnb
Mentor
I promised Steve I’d explain my scanning workflow for Instax prints so here it is. I don’t do anything special, and others might have better ideas. I use an Epson V700 flatbed scanner with Epson Scan software. I scan the prints to TIFF format and then open them in Lightroom 6, where I usually don’t do much. Sometimes I make small adjustments to contrast. I add keywords for my LR Library so I can find the image easily in future.
Next I export a copy of the TIFF with LR adjustments to Photoshop CS6 to do retouching, mainly dust and small hairs from the scan, and cloning out any Newtons Rings where the print surface has touched the scanner glass. These can be difficult to remove - I keep thinking of creating a print holder that raises the print about 1mm or less above the scanner glass to avoid the problem, as long as raising the print doesn’t take it outside the scanner’s DOF. After retouching I save the TIFF.
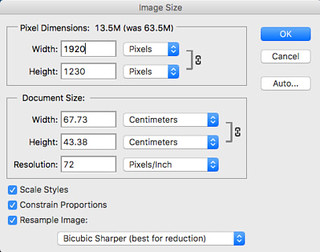
At this point I sometimes I also try Autotone to see what CS6 suggests, but as that always changes colour and contrast I usually ignore it. Once I’m happy I resize to create one large JPG at 1920 pixels and one at 1024 pixels for the RFF Gallery.
This all leaves me with the original scan and the retouched version (both TIFF) in the LR Library, and two JPEGs in a separate file directory suitable for uploading to the web.
Here it is in pictures:
laying the prints on the scanner glass:

scan preview in Epson Scan. Setting scan area (dotted line):

Zoom preview in Epson Scan with Histogram dialog open. In this case I’m happy with the black and white points, and also the mid-point (1.07). Sometimes I adjust the midpoint if the scanning software default looks a little light or dark. In those cases 1.00 is often better.
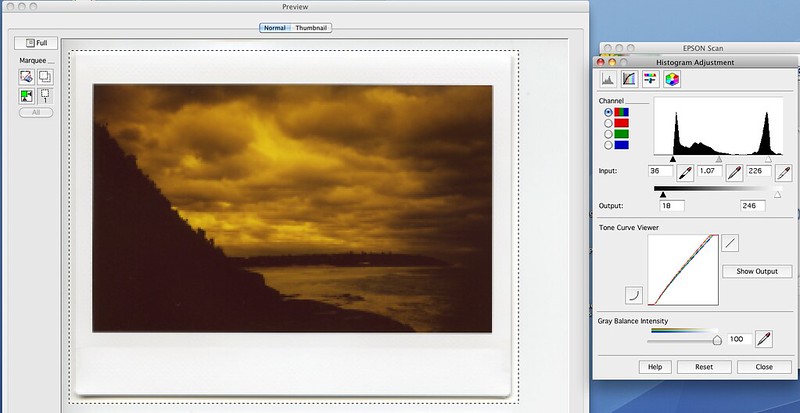
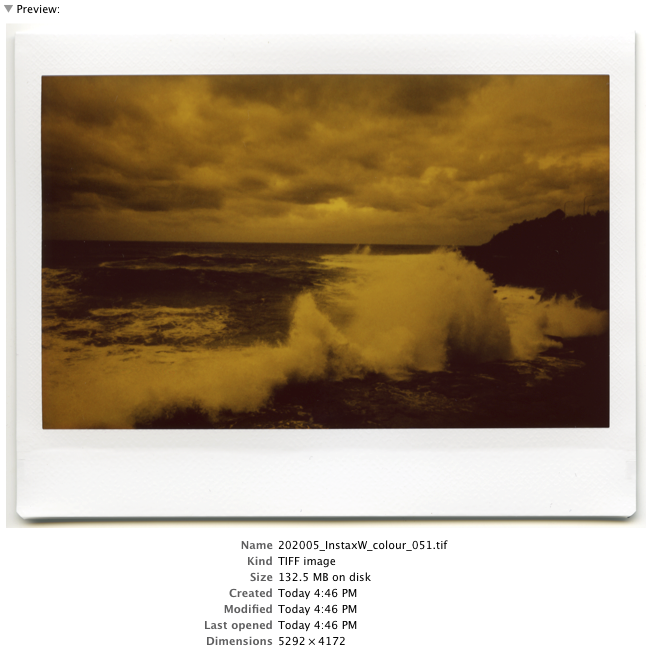
I scan Instax prints with these settings, which yield a ~60Mb TIFF file for Instax Mini prints and a 130Mb TIFF file for Instax Wide prints.

Choosing file save settings. I save original scans as TIFF files to give maximum flexibility in post processing.
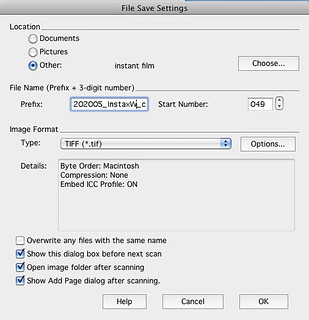
The unprocessed scan TIFF file, in this case Instax Wide. This is orange because I used color film with an orange filter held in front of the lens, for artistic effect") . I was shooting color film as if it was black and white. I like the results but your mileage may differ. I'll use a more "normal" looking color print for the remainder of this tutorial.
. I was shooting color film as if it was black and white. I like the results but your mileage may differ. I'll use a more "normal" looking color print for the remainder of this tutorial.
Editing a file in Lightroom and exporting to Photoshop.
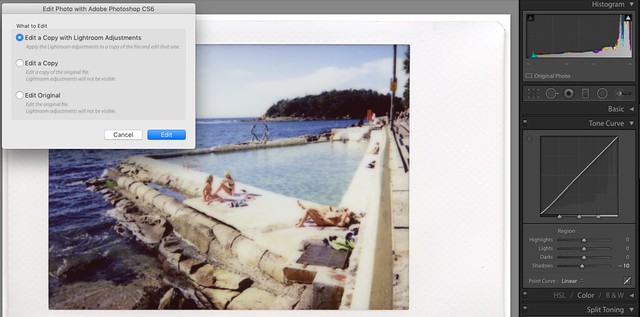
From here I'm using a scan of a picture taken with the Instax Mini 9, which has a 6 x 4.5cm picture area, half the size of the Instax Wide print above. All I’ve done here is darken the Shadows (see slider lower right set to -10), no other adjustments were necessary. I've got the dialog box open to export a copy including LR changes to CS6.
 [/url]
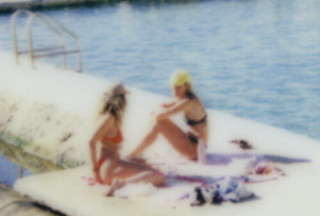
Here is how the TIFF file looks after importing to Photoshop. Quite fuzzy. That will change after resizing and unsharp masking. The first thing I do is to retouch all the dust and hair from the scan. Wiping the prints with a microfibre cloth before placing them on the scanner glass reduces this workload.
Here is the scan after applying CS6 Autotone. In this case I preferred the result and so saved this version.
Now for resizing to JPG, starting with a large version 1920 pixels wide @72 ppi using Bicubic Sharper
This is how it looks before unsharp masking
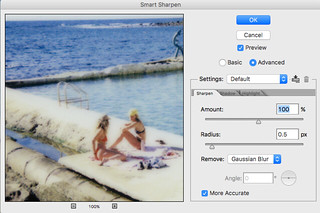
Now we have one pass of unsharp masking at 100% and 0.5 pixel radius
And then another pass, this time I adjusted it to 0.3 pixel radius as that seemed the best compromise between sharpness and noise. I judge how much by eye.

Enlarged view after the second unsharp masking:

Next I export a copy of the TIFF with LR adjustments to Photoshop CS6 to do retouching, mainly dust and small hairs from the scan, and cloning out any Newtons Rings where the print surface has touched the scanner glass. These can be difficult to remove - I keep thinking of creating a print holder that raises the print about 1mm or less above the scanner glass to avoid the problem, as long as raising the print doesn’t take it outside the scanner’s DOF. After retouching I save the TIFF.
At this point I sometimes I also try Autotone to see what CS6 suggests, but as that always changes colour and contrast I usually ignore it. Once I’m happy I resize to create one large JPG at 1920 pixels and one at 1024 pixels for the RFF Gallery.
This all leaves me with the original scan and the retouched version (both TIFF) in the LR Library, and two JPEGs in a separate file directory suitable for uploading to the web.
Here it is in pictures:
laying the prints on the scanner glass:
scan preview in Epson Scan. Setting scan area (dotted line):
Zoom preview in Epson Scan with Histogram dialog open. In this case I’m happy with the black and white points, and also the mid-point (1.07). Sometimes I adjust the midpoint if the scanning software default looks a little light or dark. In those cases 1.00 is often better.
I scan Instax prints with these settings, which yield a ~60Mb TIFF file for Instax Mini prints and a 130Mb TIFF file for Instax Wide prints.
Choosing file save settings. I save original scans as TIFF files to give maximum flexibility in post processing.
The unprocessed scan TIFF file, in this case Instax Wide. This is orange because I used color film with an orange filter held in front of the lens, for artistic effect
. I was shooting color film as if it was black and white. I like the results but your mileage may differ. I'll use a more "normal" looking color print for the remainder of this tutorial.
Editing a file in Lightroom and exporting to Photoshop.
From here I'm using a scan of a picture taken with the Instax Mini 9, which has a 6 x 4.5cm picture area, half the size of the Instax Wide print above. All I’ve done here is darken the Shadows (see slider lower right set to -10), no other adjustments were necessary. I've got the dialog box open to export a copy including LR changes to CS6.
Here is how the TIFF file looks after importing to Photoshop. Quite fuzzy. That will change after resizing and unsharp masking. The first thing I do is to retouch all the dust and hair from the scan. Wiping the prints with a microfibre cloth before placing them on the scanner glass reduces this workload.
Here is the scan after applying CS6 Autotone. In this case I preferred the result and so saved this version.
Now for resizing to JPG, starting with a large version 1920 pixels wide @72 ppi using Bicubic Sharper
This is how it looks before unsharp masking
Now we have one pass of unsharp masking at 100% and 0.5 pixel radius
And then another pass, this time I adjusted it to 0.3 pixel radius as that seemed the best compromise between sharpness and noise. I judge how much by eye.
Enlarged view after the second unsharp masking:
lynnb
Mentor
Now it’s time to save the large JPG. I use File - Save For Web in Photoshop
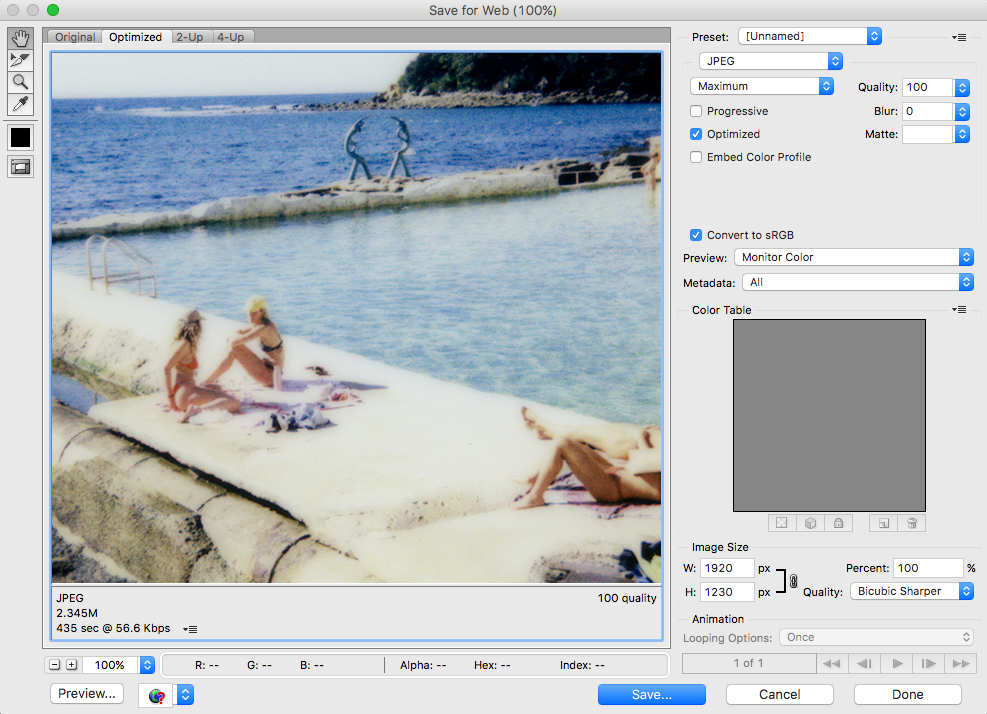
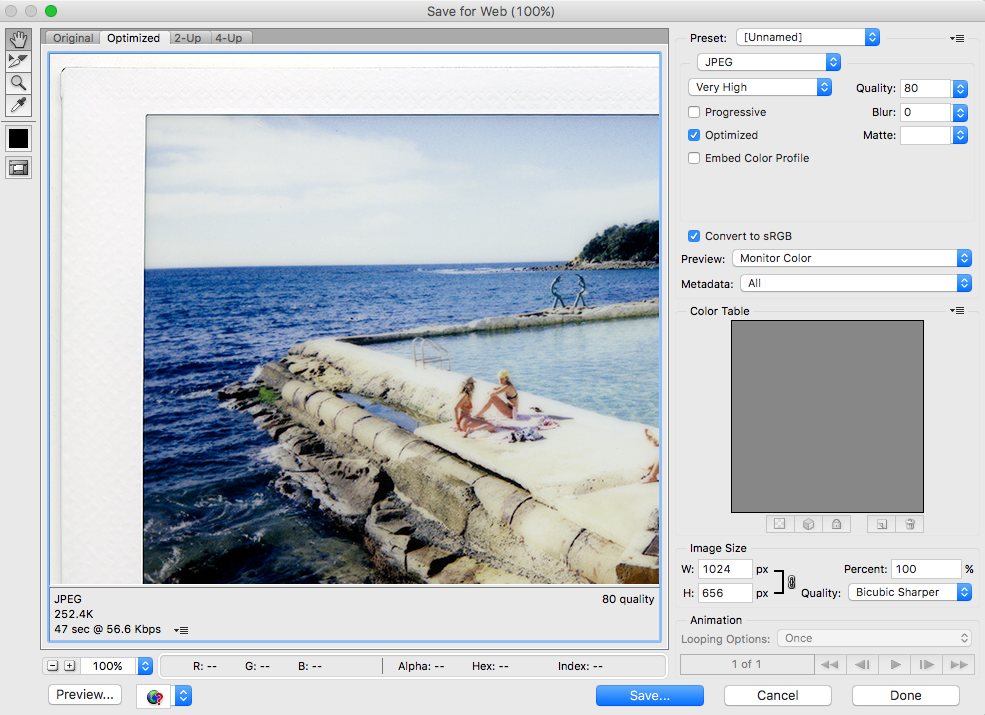
…and the smaller 1024 pixel JPG for the RFF Gallery. I've adjusted the Quality to "Very High" to get the file size under the RFF Gallery limit of <600Kb.
Here's the RFF Gallery JPG:
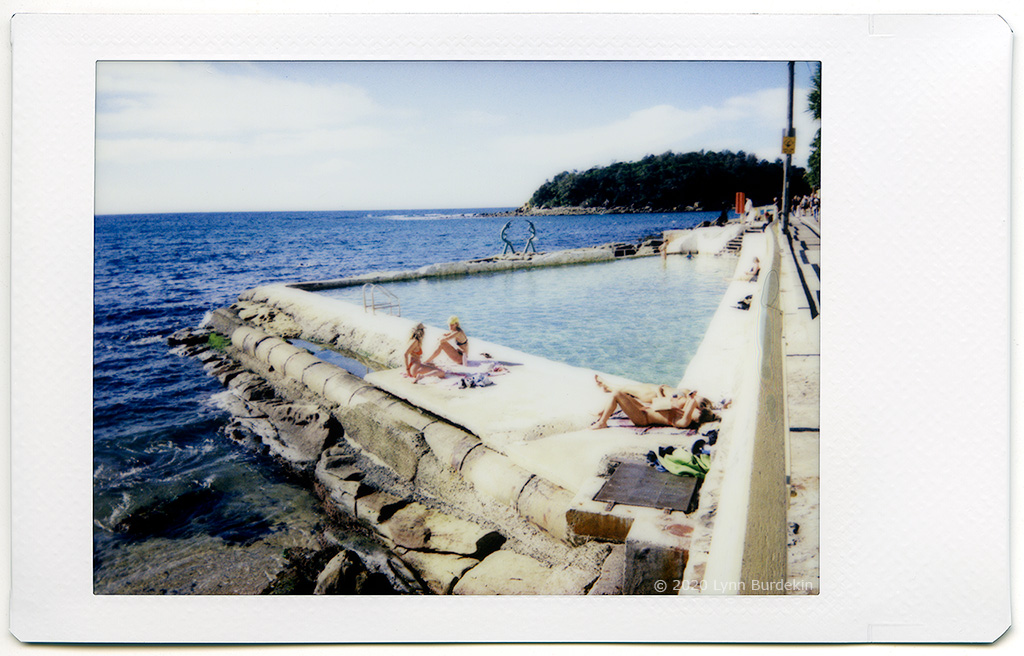
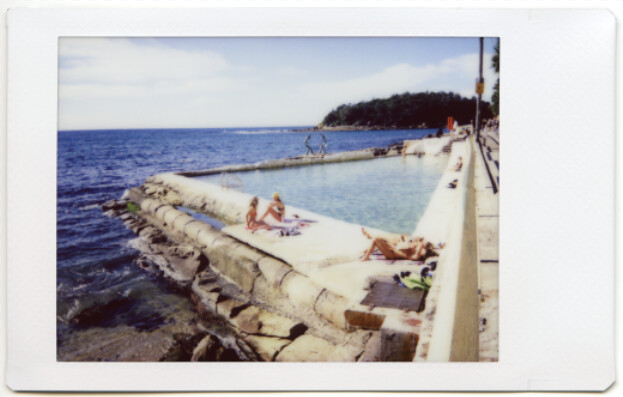
...and here’s a link to the 1920 pixel finished scan from the Instax Mini 9. File size is 1920 x 1230 pixels and 2.5Mb. Note I haven’t attempted to deal with the Newtons Rings, visible on the right hand side along the pool border. Please don’t copy or distribute this picture.
…and the smaller 1024 pixel JPG for the RFF Gallery. I've adjusted the Quality to "Very High" to get the file size under the RFF Gallery limit of <600Kb.
Here's the RFF Gallery JPG:
...and here’s a link to the 1920 pixel finished scan from the Instax Mini 9. File size is 1920 x 1230 pixels and 2.5Mb. Note I haven’t attempted to deal with the Newtons Rings, visible on the right hand side along the pool border. Please don’t copy or distribute this picture.
chipgreenberg
Well-known
Great info Lynn. Thank you!
Anybody ever use something like the Epson Fast Photo? Would that resolve the newton ring issue?
Anybody ever use something like the Epson Fast Photo? Would that resolve the newton ring issue?
Godfrey
somewhat colored
Nice stuff, Lynnb.
My scanning setup is a little different. I have done many revs of flatbed scanner techniques and given up... I never found a way to completely eliminate the Newton rings and still get the sharpness I wanted.
What I'm doing now is a copy camera technique with either my Leica CL or Hasselblad 907x, and the Leica Macro-Elmarit-R 60mm lens. I capture raw, bring into LR, and adjust until the capture matches the photo. Very little adjustment is needed most of the time.
Then I output to JPEG and post. Here's an example, at 1600 pixels wide:
The quality is quite good, the lighting is a pain to setup but worth it when I do a batch of several dozen at a time.
G
Bingley
Mentor
Lynn, THANK YOU!! These are great workflow descriptions. I will try to adapt to my Epson V600 scanner. Extremely helpful!
Larry Cloetta
Mentor
Lynn,
I would have thought it would have been better to sharpen the large file right out of the scanner, 132.5 MB, or your subsequent 63.5 MB file before reducing it to the smaller 13.5 MB file size and then unsharp masking it. No? Or do you think it works better the way you sequenced it, the bicubic sharper which occurs at file resizing, then followed by unsharp masking of the smaller, resized jpg?
I guess you have worked it out, I am just trying to save myself some work
Bingley
Mentor
Has anyone tried scanning with the Google Photoscan app? It’s free and seems to work pretty well, although the scans are not as detailed as .tiff files using lynnb’s technique (the scanned image is a jpeg). The app takes multiple scans of an instax photo, thereby eliminating glare, and then copies the image to the Cameral Roll on an iPhone. From there, you ought to be able to make adjustments in LR or PS. Interested if anyone else is using this app?
lynnb
Mentor
Lynn,
I would have thought it would have been better to sharpen the large file right out of the scanner, 132.5 MB, or your subsequent 63.5 MB file before reducing it to the smaller 13.5 MB file size and then unsharp masking it. No? Or do you think it works better the way you sequenced it, the bicubic sharper which occurs at file resizing, then followed by unsharp masking of the smaller, resized jpg?
I guess you have worked it out, I am just trying to save myself some work
Hi Larry, sorry it's taken me so long to get back to you. I remember a printing tutorial (can't remember exactly where but I think it was on LuLa) which advised to always leave unsharp masking to the last step before printing. I can't remember the logic behind it but it seemed to make sense and I've followed it ever since. I'm guessing that an image sharpened at a big size might look oversharp if reduced?
Cheers,
lynnb
Mentor
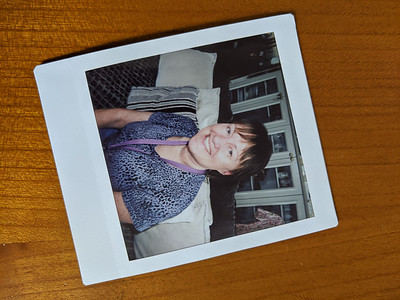
A while since I've posted to this thread and I have a lot of catch-up to do. I'll start with a small diversion into bw conversions. I quite like how the Instax color film converts to bw and have taken some pictures with the intention of converting to bw; but mostly I use bw conversions to rescue underexposed pictures (underexposed Instax is not a pretty sight, very muddy-looking - see below).
Here's an example. I couldn't rescue the original scan in color no matter how hard I tried, but I like the bw. My apologies for all the selfies
original

by lynnb's snaps, on Flickr
playing around with desaturation + Color Temp/Tint controls in LR6:
 by lynn's snaps, on Flickr
Here's an example. I couldn't rescue the original scan in color no matter how hard I tried, but I like the bw. My apologies for all the selfies
original
by lynnb's snaps, on Flickr
playing around with desaturation + Color Temp/Tint controls in LR6:
Shab
Well-known
Oh Lynn!!
So a lovely thread!! Really, you are an artist!! The pictures are so special...
Thank you for sharing!
And I need to tell myself: "I don't need these cameras! I don't need these cameras!!" ;-)
So a lovely thread!! Really, you are an artist!! The pictures are so special...
Thank you for sharing!
And I need to tell myself: "I don't need these cameras! I don't need these cameras!!" ;-)
lynnb
Mentor
Oh Lynn!!
So a lovely thread!! Really, you are an artist!! The pictures are so special...
Thank you for sharing!
And I need to tell myself: "I don't need these cameras! I don't need these cameras!!" ;-)
Thank you Xabier! I must advise you that I also told myself those exact same words
Instax SQ6 - the Goldilocks Instax
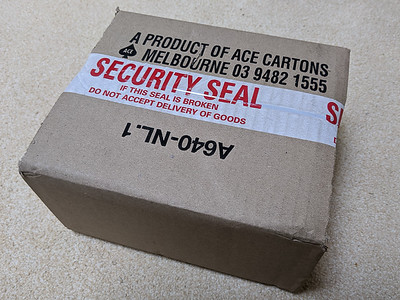
Having tried the Instax Mini and Instax Wide 300 and gained an appreciation of both the film and the cameras - and their limitations - I wondered if the SQ6 might be the Goldilocks compromise. Feature-wise it looked better than both. Specifications. Downside: it uses two CR2 lithium batteries.
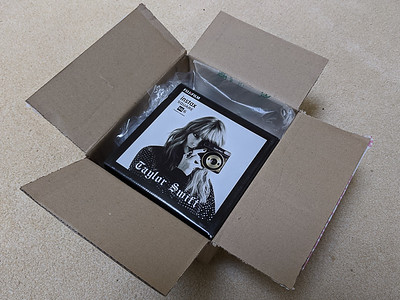
The problem was the price, AUD$199, more than I wanted to pay*. I spotted a “Taylor Swift” limited edition SQ6 in a local discount department store for AUD$139, tempting but still too much… a quick internet search turned up another Taylor Swift SQ6 from a Melbourne camera store for AUD$99, too good to refuse! I figured the Taylor Swift decorations are a stealth makeover…
*All my Instax adventures have been fully funded by the Australian government’s COVID-19 cash splash
. Thank you ScoMo!Now to the unboxing (I believe unboxing rituals are now de rigueur amongst reviewers):
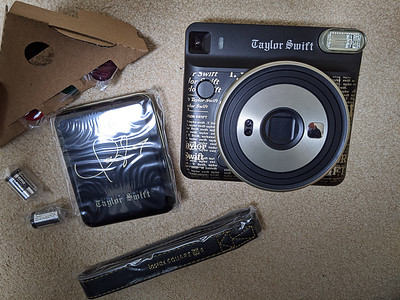
On the back are all the controls - lots more control options than the Mini 9 and the Instax Wide 300, including double exposures.
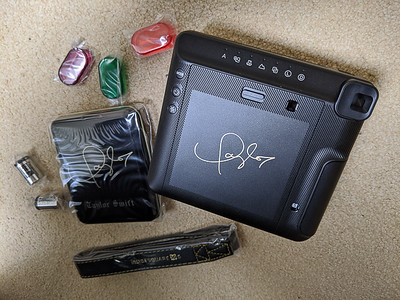
straight out of the box this camera gets a 5-Star WAF (Wife Approval Factor). Great!
Next: first pictures with the Instax Square SQ6 Taylor Swift!
Share:
-
This site uses cookies to help personalise content, tailor your experience and to keep you logged in if you register.
By continuing to use this site, you are consenting to our use of cookies.